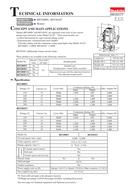

0
Owner's of the Makita Router electronic router gave it a score of 0 out of 5. Here's how the scores stacked up:
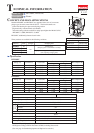
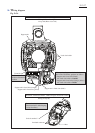

[3] DISASSEMBLY/ASSEMBLY
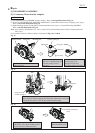
[3]-1. Base complete
DISASSEMBLING
ASSEMBLING
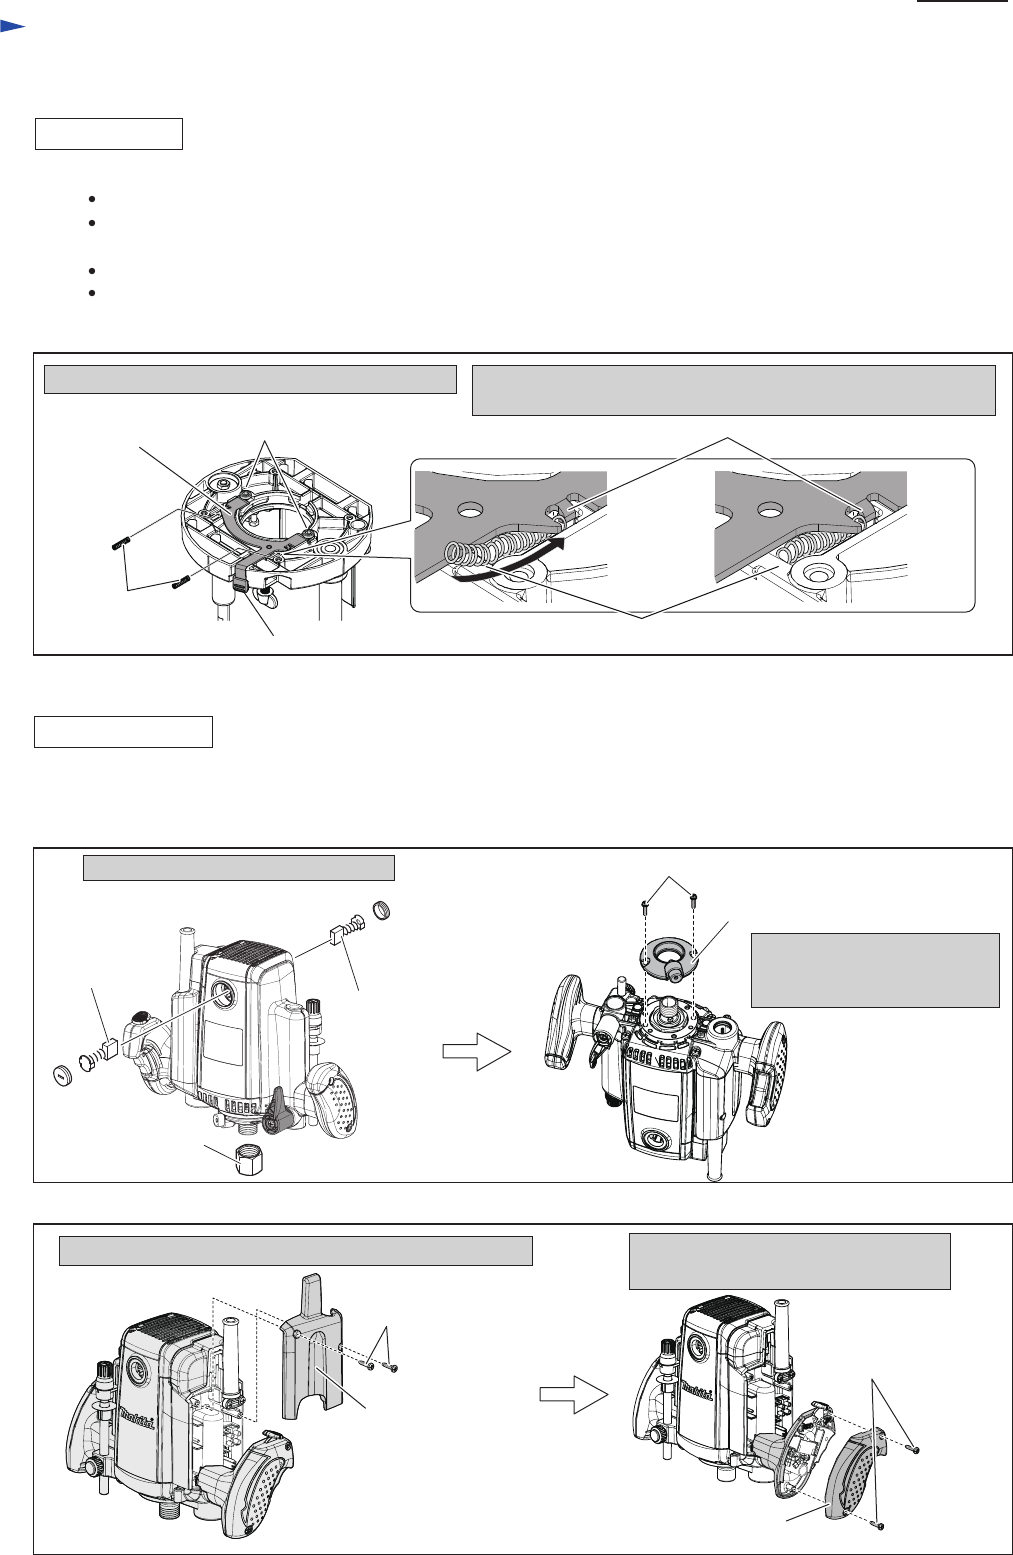
Fig. 6
Fig. 7
Fig. 8
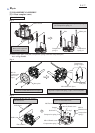
Lock plate
Lever portion of Lock plate
Hook of Lock plate
1. Screw M5x10 Set bolt (2pcs.) to Base complete 2. Set Compression spring 4 in place between the groove end of
Base complete and the hook of Lock plate.
Groove end of Base complete
M5x10 Set bolt (2pcs.)
Compression
spring 4
Take the disassembling step in reverse.
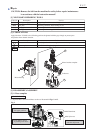
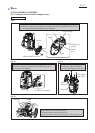
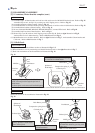
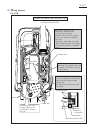
[3]-2. Armature, Motor bracket complete
(1) Separate Base section from Motor section as illustrated in Figs. 2 and 3.
(2) Disassemble Armature as illustrated in Figs. 7, 8, 9, 10, 11, 12 and 13.
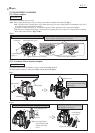
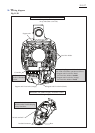
Collet nut
Carbon brush
Carbon brush
Cover
Remove carbon brush and Collet nut.
Remove Retainer cover by
unscrewing M4x18 Pan head
screw (2pcs.)
Remove Cover by unscrewing 4x18 Tapping screw (2pcs.)
Note: It is impossible to
disassemble Grip R
without removing
Cover.
M4x18 Pan head screw (2pcs.)
4x18 Tapping screw
(2pcs.)
4x18 Tapping
screw (2pcs.)
Retainer cover
Grip cover (R)
Remove Grip cover (R) by unscrewing
4x18 Tapping screw (2pcs.)
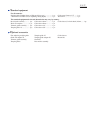
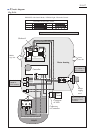
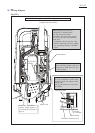
Repair
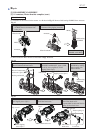
Note: Set Compression spring 4 (2pcs.) in the groove on Base complete as illustrated in Fig. 6
M6 - Flat head screw is thread-locker type. When removing it, be sure to apply adhesive (ThreeBond 1321/ 1342
or Loctite 242) to the thread before reusing.
Assemble Compression spring 11, Compression spring 13, Pole and Silent pole as illustrated in Fig. 3.
Check that two Compression springs 4 work properly by pulling the lever portion of Lock plate after assembling
Base plate to Base. Refer to Figs. 6 and 4.
P 5/ 27


Find Your Products By Category
Please Login
