
0
Owner's of the Bayou Classic Cooktop DB250 gave it a score of 0 out of 5. Here's how the scores stacked up:

O
N
-
C
O
U
N
T
E
R
-
C
L
O
C
K
W
I
S
E
O
N
-
C
O
U
N
T
E
R
-
C
L
O
C
K
W
I
S
E
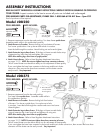
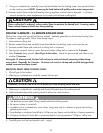
16
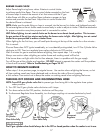
LIGHT
BURNER
HERE!
Place lit Match over Burner
S-L-O-W-L-Y
Turn Brass Valve ON
3
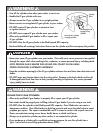
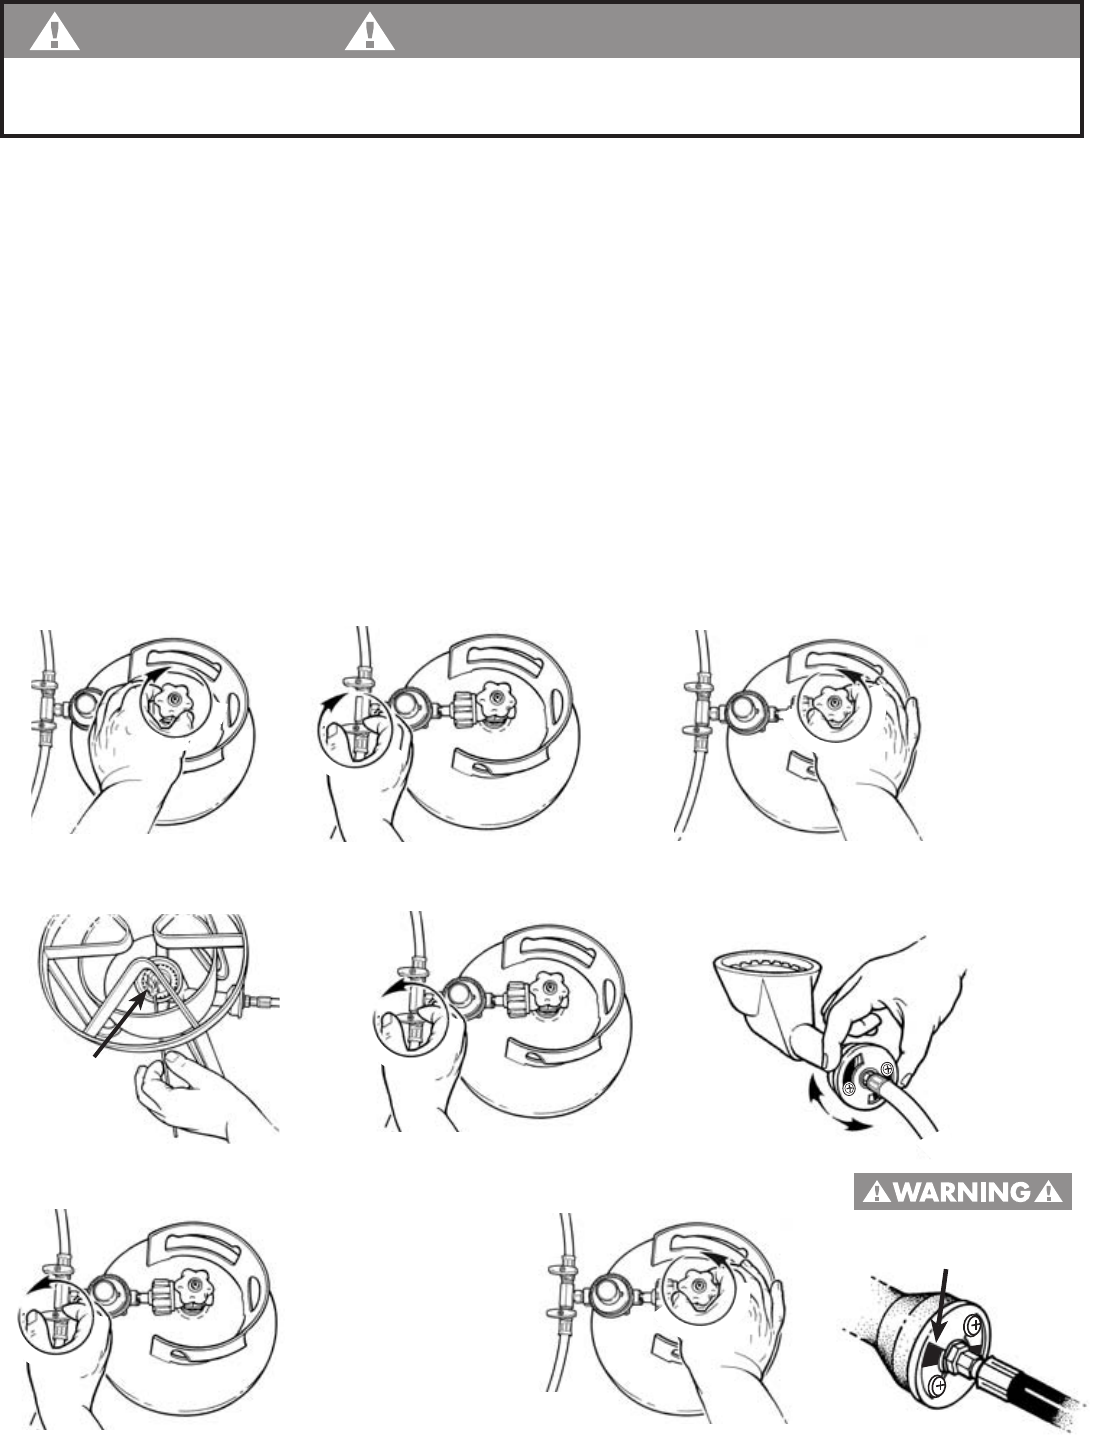
LIGHTING INSTRUCTIONS
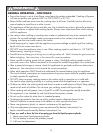
WARNING
DO NOT stand with head, body or arms over the cooker when lighting. Loose clothing and hair can
catch fire during lighting and operation.
Follow these instructions exactly. Read and follow all warnings and instructions in this manual before
using your cooker
.
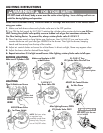
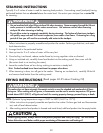
1. Make sure both brass valves and cylinder valve are in the OFF position.
2. Turn ON the fuel supply by S-L-O-W-L-Y rotating the cylinder valve counter-clockwise one full turn.
HINT: Turning the cylinder valve quickly causes a sudden rush of gas that sometimes activates the
Gas Flow Limiting Device. To prevent this, always rotate cylinder valve S-L-O-W-L-Y.
3. Place fire place match or long lighter over the burner, then S-L-O-W-L-Y turn one brass valve
counter-clockwise until you hear gas HISSING to the burner. Then light the burner, keeping
hands and face away from the top of the cooker.
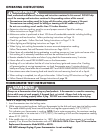
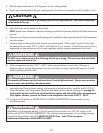
4. Adjust air control shutter on burner for a blue flame. In direct sunlight, flame may appear clear.
5. Adjust the brass valve for desired flame height.
6. Repeat instructions 3-5 to light second burner. After lighting, rotate cylinder valve to full open.
S-L-O-W-L-Y Turn
LP Cylinder V
alve One Full Turn
O
F
F
-
C
L
O
C
K
W
I
S
E
Make sure LP Cylinder is OFF
1
Make sure Regulator is OFF
at both valves
BEFORE LIGHTING
2
LIGHTING
ADJUST Air Control Shutter
for Blue Flame
4
ADJUST Brass Valve
for Flame Height
5
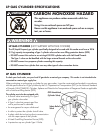
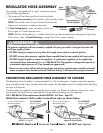
NOTE: The brass valves
on regulator hose
assembly control flame
intensity only
. They are
not an ON/OFF valves.
Position hand
below bur
ner
Gas will flow
to and stop
at closed regulator
DO NOT light burner
at air intake
O
N
-
C
O
U
N
T
E
R
-
C
L
O
C
K
W
I
S
E
O
F
F
-
C
L
O
C
K
W
I
S
E
O
P
E
N
V
A
L
V
E
F
U
L
L
Y
After lighting Burners, OPEN
LP Cylinder V
alve FULLY
6
FOR YOUR SAFETY:


Find Your Products By Category
Please Login
