
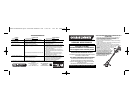
2.9
Owner's of the Black & Decker Trimmer AF-100 gave it a score of 2.9 out of 5. Here's how the scores stacked up:


10
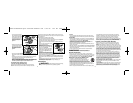
LINE FEEDING
Your trimmer uses .065 in. (1.65mm) diameter nylon line to cut grass
and weeds quickly and easily. In time, the tip of the nylon line will
become worn and the auto feed mechanism will automatically feed
and trim a fresh length of line.
The cutting line will wear faster if the cutting is done along sidewalks
or other abrasive surfaces or heavier weeds are being cut. The
automatic feed mechanism senses when more cutting line is needed
and feeds and trims the correct length of line whenever it is required.
Do not bump unit on ground in attempt to feed line or for any
other purpose.
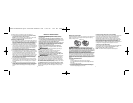
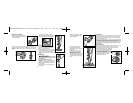
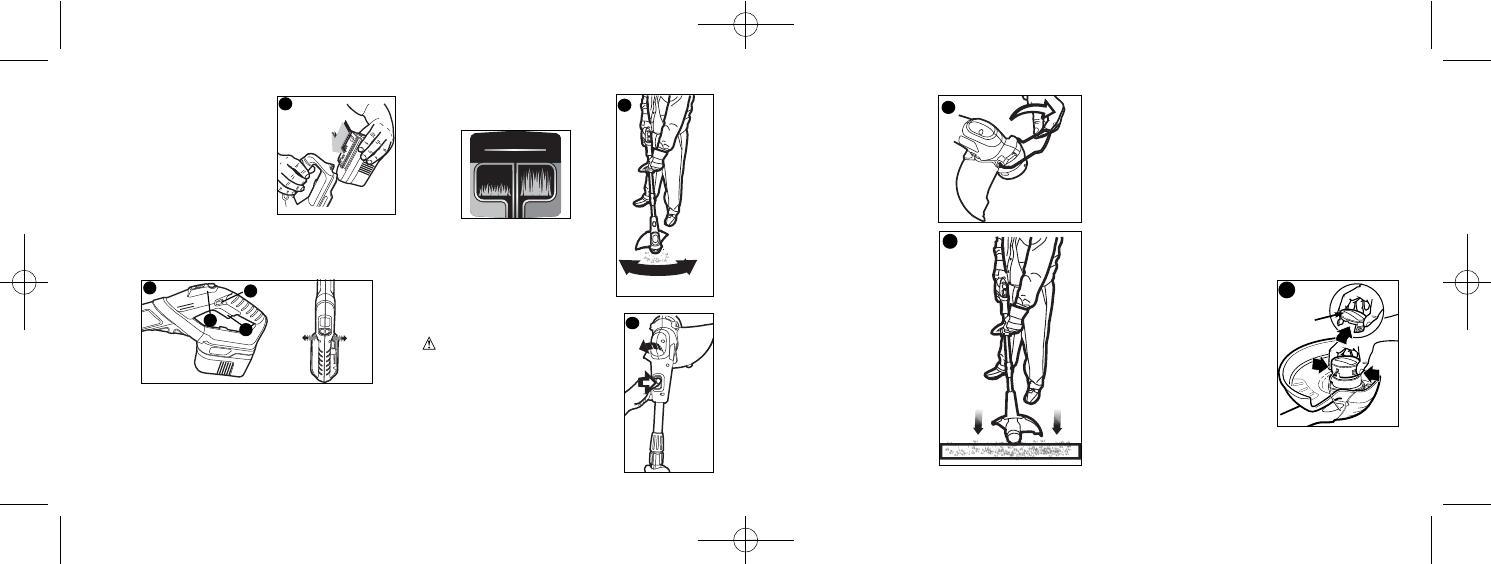
REPLACING SPOOL
Black & Decker recommends that for optimal performance, use only
Black & Decker replacement spools (AF-100) which can be
purchased at many local tool retailers. If you need assistance
regarding accessories call 1-800-544-6986.
• Turn off the trimmer and remove the battery.
• Press the release tabs on the line spool
cover, as shown in figure N and remove
the cover by pulling it straight off.
• Lift the spool of nylon line out of the hub
and clear any broken line or cutting
debris from the spool area.
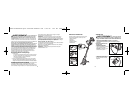
• Rotate the wire edge guide forward
and down into place before edging,
as shown in figure L.
• To operate as a maintenance
edger, position trimmer above
sidewalk or other surface as shown
in figure M.
• To return to the trimming position,
turn the tool off, push in on the
release button and rotate the
trimmer head counter clockwise
until it stops. When using the tool in
the trimmer mode you may choose
to fold the wire edge guide up out of
the way
.
11
M
L
N
RC-100-P
Cap
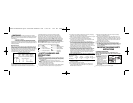
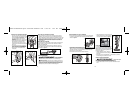
• To turn the tool off, release the trigger.
• Hold trimmer with two hands and slowly swing
trimmer side-to-side as shown in figure J.
POWER COMMAND
TM
FEATURE
The Power Command feature (3) is located
on the tool handle as shown in figure I. It
allows you to optimize the tools
performance and boost the power as needed.
• Operate in “Normal” mode for most trimming
needs. (Longer runtime will be achieved.)
• Switch to “Boost” mode on the fly when tall, wet or thick conditions are
present.
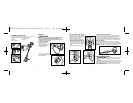
EDGING MODE
•
WARNING: Remove battery
pack from tool before attempting to make
any adjustment.
To convert for maintenance edging:
• Hold the trimmer with one hand and grasp the
housing.
• Push in on the release button (as shown in
figure K ) and rotate the trimmer head until it
stops, (half turn).
• Release your hand. The tool is locked in the
edger position.
OPERATING THE TRIMMER
• Insert the fully charged battery into the
trimmer until you hear it “click” into place
as shown in figure H.
• To turn the trimmer on, push the lock off button (1), across and, then
squeeze the trigger switch (2) shown in figure I. In a few seconds or
less youʼll hear the nylon line being cut automatically to the proper
length.
H
J
POWER
COMMAND
TM
NORMAL
BOOST
K
I
2
1
3
90563738 NST1024.qxd: chainsaw booklet new 5/25/10 1:13 PM Page 10


Find Your Products By Category
Please Login
