
0
Owner's of the GPX Stereo System GPX Stereo System gave it a score of 0 out of 5. Here's how the scores stacked up:
1. In Power off mode, press and
hold the Clock button.
2. While holding the Clock button press
the Hour button to adjust the hour.
The PM indicator will light when
the hour is set in the PM.
3. While holding the Clock button press the
Minute button to adjust the minute.
4. Release the Clock button once
the correct time is set.
1. In Power off mode, press and
hold the Alarm Set button.
2. While holding the Alarm Set button press
the Hour button to adjust the hour.
The PM indicator will light when
the hour is set in the PM.
3. While holding the Alarm Set button press
the Minute button to adjust the minute.
4. Release the Alarm Set button
once the correct time is set.
5. To set the alarm sound, adjust the
Source switch to Line In/iPod for the
buzzer or AM/FM for the radio.
Note: Line In/iPod will not play music
through a connected device as an alarm.
6. Press the Alarm On/Off button to
activate or de-activate the alarm.
When set and turned on, a small alarm
indicator icon will appear on the display.
7. Once the set alarm time is
reached, the alarm will sound.
8. Press the Alarm On/Off button
to turn off the alarm sound.
1. Press the Power button
to turn the unit on.
2. Adjust the Source switch (Line In, iPod,
FM, AM) to the FM or AM position.
3. Turn the Tuning dial to the desired station.
Adjust the FM Antenna to
improve FM radio reception.
An AM antenna is built into the unit. Adjust
the unit to improve AM radio reception.
Clock
Alarm
Radio
Setting the Clock
Setting the Alarm
Tuning the AM or FM Radio
For Warranty Information and the most up-to-date version of this User’s Guide, go to www.gpx.com Customer Service: 1-888-999-4215
Email Support: prodinfo@dpiinc.com, Email Parts: partsinfo@dpiinc.com
Copyright © 2012 Digital Products International (DPI, Inc.) All other trademarks appearing herein are the property of their respective owners. Specications are subject to change without notice.
To download this User’s Guide in English,
Spanish, or French, or to get answers
to frequently asked questions, visit the
support section at: www.gpx.com
Para descargar este Manual del Usuario en
inglés, español y francés, o para obtener
respuestas a preguntas frecuentes, visite
la sección de apoyo en www.gpx.com
Pour télécharger ce guide de l’utilisateur
en anglais, espagnol ou français, ou pour
obtenir des réponses à des questions
fréquemment posées, consultez la rubrique
d’assistance sur www.gpx.com
International Support
1. Connect a iPod to the unit by
inserting the Dock Connector
into the headphone jack located
at the bottom of the iPod.
2. Adjust the Source switch (Line
In, iPod, FM, AM) to iPod.
3. Use the native controls on the
connected iPod to play and control
audio played through the unit.
Please note, this unit will not
charge the connected device.
Connecting and Playing
an Audio Device
Using the Dock Connector
Requires a 3.5mm audio cable (not included)
1. Connect a 3.5mm audio cable to the
Line In on the unit and an audio output
on an MP3 player or other audio source.
2. Adjust the Source switch (Line In,
iPod, FM, AM) to the Line In position.
3. Use the native controls on the
connected MP3 player or other audio
source to play and control audio
played through the clock radio.
Using the Line In
Connecting Speakers to the Unit
1. Connect the speaker cables,
which are attached to the external
speakers, to the Speaker Outputs
located on the back of the unit.
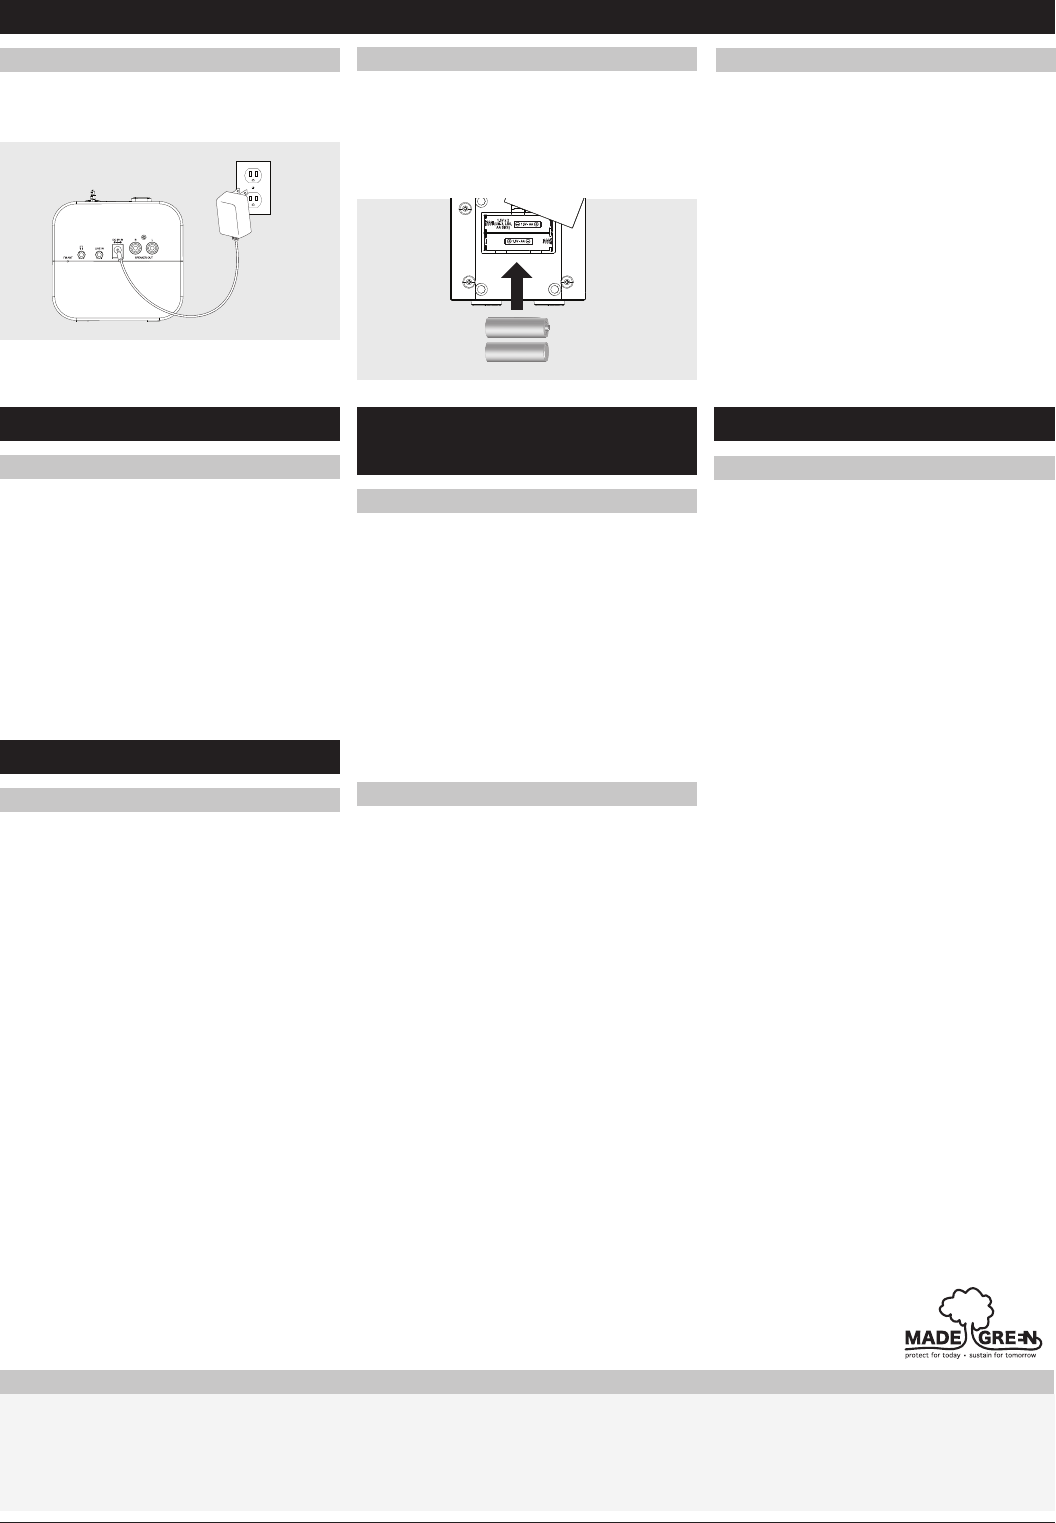
Plug the included AC/DC power adapter into
the DC POWER INPUT on the dock and
an AC power outlet to power the dock.
Power
The battery backup is intended for
short power outages only. The clock
radio’s primary functions cannot run
off of the battery backup alone.
Requires 2, AA-size, batteries (not included)
Battery Backup
Setup


Find Your Products By Category
Please Login
