
0
Owner's of the Schumacher Automobile Battery Charger Automatic gave it a score of 0 out of 5. Here's how the scores stacked up:


8
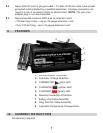
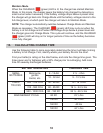
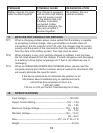
CONTROL PANEL11.
LED Indicators
CONNECTED (red) LED lit: Indicates that there is AC power supplied to
the battery charger.
CHARGING (yellow) LED lit: Indicates the charger is charging the
battery.
CHARGING (yellow)LEDashing:Indicates the charger is in abort mode.
CHARGED (green) LED lit: Indicates the battery is fully charged and the
charger is in maintain mode.
NOTE: See the Operating Instructions section for a complete description of the
charger modes.
OPERATING INSTRUCTIONS12.
Automatic Voltage Detection
When the charger is connected to a battery, it will automatically determine
whether the connected battery is a 6 Volt battery or a 12 Volt battery. This
eliminates the possibility of using the wrong voltage setting.
Automatic Temperature Compensation
The charger adjusts the maximum charge voltage and maximum maintain
voltage based on the ambient air temperature. This permits optimum charging
and safety.
Thermal Runaway
The charger automatically reduces the current if it detects the battery may be
getting too hot. This is a safety precaution.
Charging
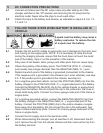
Ensure that all of the charger components are in place and in good 1.
working condition, including the plastic boots on the battery clips.
Connect the battery following the connection instructions described in 2.
Using the Quick-Disconnect Cable Connectors section.
Connect the AC power following the precautions listed in Section 8.3.
If you’ve connected everything correctly, the CHARGING 4.
(yellow) LED should be lit indicating that the charger is charging. If the
CHARGING (yellow) LED does not light, check the connections or
have the battery checked/replaced.


Find Your Products By Category
Please Login
