

0
Owner's of the DeWalt Saw Dewalt Next Gen Circular Saw Kit gave it a score of 0 out of 5. Here's how the scores stacked up:


7
English
INTENDED USE
These heavy-duty circular saws are designed for professional wood
cutting applications. DO NOT use water feed attachments with this
saw. DO NOT use abrasive wheels or blades. DO NOT use under wet
conditions or in presence of flammable liquids or gases.
These heavy-duty saws are professional power tools. DO NOT let
children come into contact with the tool. Supervision is required when
inexperienced operators use this tool.
ADJUSTMENTS
Changing Blades
WARNING: To reduce the risk of injury, turn unit off and
disconnect it from power source before installing and removing
accessories, before adjusting or when making repairs. An
accidental start-up can cause injury.
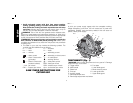
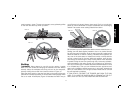
M
J
N
FIG. 2
FIG. 3
K
I
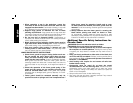
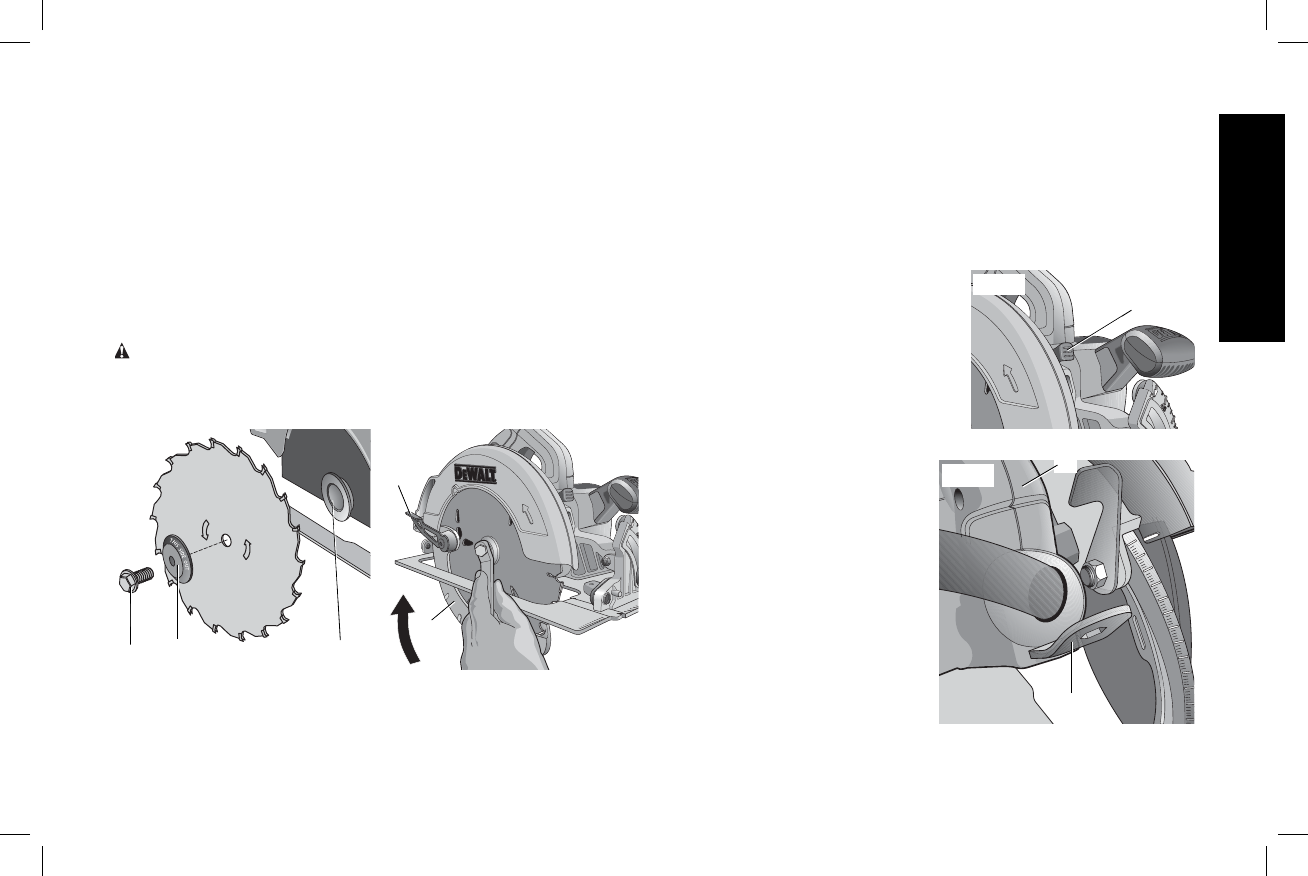
TO INSTALL THE BLADE (FIG. 2–5)
1. Using the lower guard lever (K), retract the lower blade guard (I) and
place blade on saw spindle against the inner clamp washer (M),
making sure that the blade will rotate in the proper direction (the
direction of the rotation arrow on the saw blade and the teeth must
point in the same direction as the direction of rotation arrow on the
saw). Do not assume that the printing on the blade will always be
facing you when properly installed. When retracting the lower blade
guard to install the blade, check the condition and operation of the
lower blade guard to assure that it is working properly. Make sure
it moves freely and does not touch the blade or any other part, in
all angles and depths of cut.
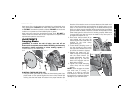
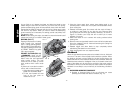
2. Place outer clamp washer (N) on
C
FIG. 4
saw spindle with the large flat
surface against the blade and the
wording on the outer clamp
washer facing you.
3. Thread blade clamping screw (J)
into saw spindle by hand (screw
has right-hand threads and must
be turned clockwise to tighten).
4. Depress the blade lock (C)
FIG. 5
O
FIG. 5
B
while turning the saw spindle
with the blade wrench (O)
stored underneath the main
handle (B) (Fig. 5), until the
blade lock engages and the
blade stops rotating.
5. Tighten the blade clamping
screw firmly with the blade
wrench.
NOTE: Never engage the blade
lock while saw is running, or
engage in an effort to stop the
tool. Never turn the saw on while
the blade lock is engaged. Serious
damage to your saw will result.


Find Your Products By Category
Please Login
