
0
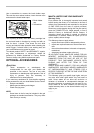
Owner's of the Makita Cordless Saw Makita Cordless Reciprocating Saw gave it a score of 0 out of 5. Here's how the scores stacked up:
6
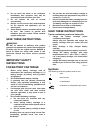
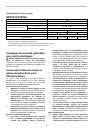
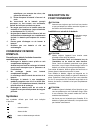
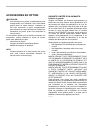
When the blade loses its cutting efficiency in one place
along its cutting edge, reposition the shoe to utilize a
sharp, unused portion of its cutting edge. This will help to
lengthen the life of the blade. To reposition the shoe,
push the shoe button in the "A" direction with a click and
reposition as shown in the figure which allows you to
make five-way adjustment. To secure the shoe, push the
shoe button in the "B" direction with a click.
Switch action
1
B
A
2
006900
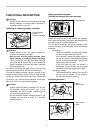
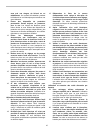
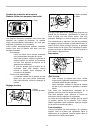
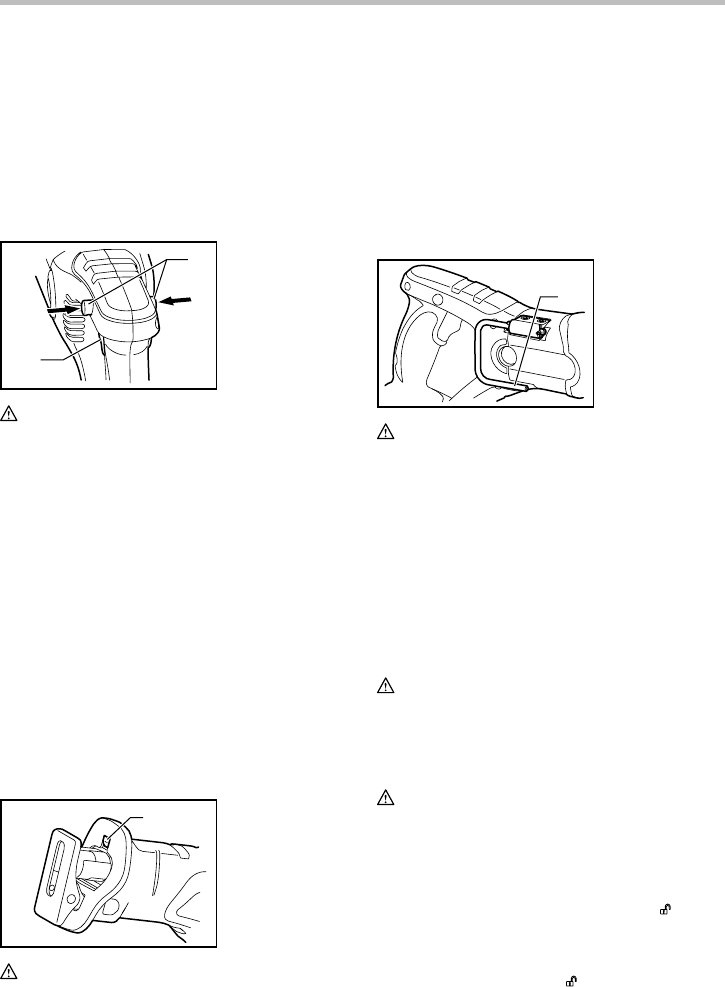
CAUTION:
• Before inserting the battery cartridge into the tool,
always check to see that the switch trigger
actuates properly and returns to the "OFF" position
when released.
• When not operating the tool, depress the lock-off
button from A side to lock the switch trigger in the
OFF position.
To prevent the switch trigger from accidentally pulled,
the lock-off button is provided.
To start the tool, depress the lock-off button from B side
and pull the switch trigger.
Tool speed is increased by increasing pressure on the
switch trigger. Release the switch trigger to stop. After
use, always press in the lock-off button from A side.
Electric brake
This tool is equipped with an electric brake. If the tool
consistently fails to quickly stop after switch trigger
release, have tool serviced at a Makita service center.
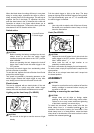
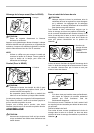
Lighting up the front lamp (For XRJ02)
1
006901
CAUTION:
• Do not look in the light or see the source of light
directly.
Pull the switch trigger to light up the lamp. The lamp
keeps on lighting while the switch trigger is being pulled.
The light automatically goes out 10 - 15 seconds after
the switch trigger is released.
NOTE:
• Use a dry cloth to wipe the dirt off the lens of lamp.
Be careful not to scratch the lens of lamp, or it may
lower the illumination.
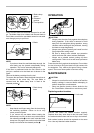
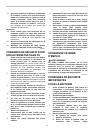
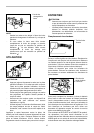
Hook (For XRJ02)
1
006902
CAUTION:
• Depress the lock-off button from A side to lock the
switch trigger in the OFF position. (See the section
titled " switch action " .)
• Never hook the tool at high location or on
potentially unstable surface.
The hook is convenient for hanging the tool temporarily.
To use the hook, simply lift up hook until it snaps into the
open position.
When not in use, always lower hook until it snaps into
the closed position.
ASSEMBLY
CAUTION:
• Always be sure that the tool is switched off and the
battery cartridge is removed before carrying out
any work on the tool.
Installing or removing the saw blade
CAUTION:
• Always clean out all chips or foreign matter
adhering to the blade, blade clamp and/or slider.
Failure to do so may cause insufficient tightening
of the blade, resulting in a serious injury.
To install the saw blade, always make sure that the
blade clamp lever is in released position
on the
insulation cover before inserting the saw blade. If the
blade clamp lever is in fixed position, rotate the blade
clamp lever in the direction of the arrow so that it can be
locked at the released position
.
1. Hook
1. Lamp
1. Lock-off button
2. Switch trigger


Find Your Products By Category
Please Login
