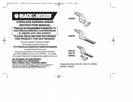

0
Owner's of the Black & Decker Trimmer GSN30 gave it a score of 0 out of 5. Here's how the scores stacked up:

4
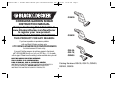
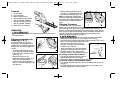
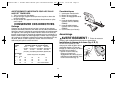
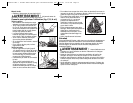
Features
1. On/off switch
2. Lock-off button
3. Blade release button
4. Grass Shear blade (GSL35,
GSL75, GSN30, GSN35)
5. Shrub Trim blade (GSL35,
GSL75, GSN32, GSN35)
6. Blade cover (not shown)
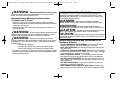
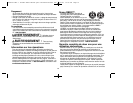
Assembly
WARNING: Avoid accidentally switching the tool on
during assembly.
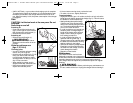
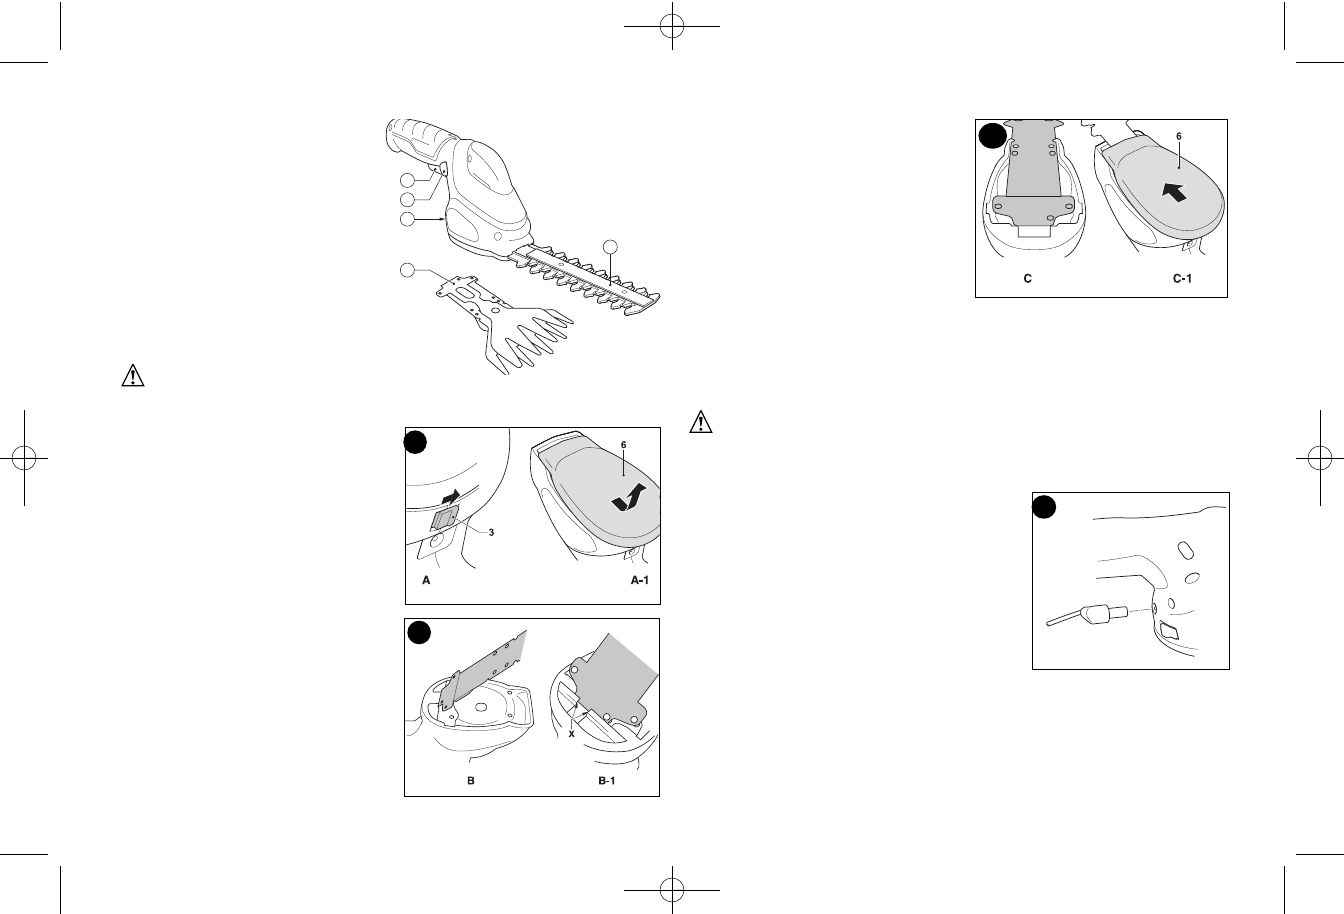
Fitting and removing the
blade (fig. A, B, C)
The shear blade (4) has been
designed for trimming grass and
weeds. The trim blade (5) has been
designed for trimming hedges and
shrubs.
• To remove the blade cover (6).
Push and hold the blade release
button (3) in the direction of the
arrow (fig. A)
• Slide the blade cover (6)
backwards and lift it off (fig. A-1).
Make sure that the blade is
located under edge marked ʻXʼ
(fig. B-1) and then lower the blade
onto the pins.
• While holding the blade onto the
pins (Fig. C), locate the blade cover
(6) and slide it forward (fig. C-1).
Note: No alignment of blade with
drive pin is required and operation of
the blade cover release button is not
required when re-fitting the blade
cover.
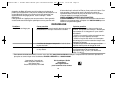
Charging Procedure
The battery needs to be charged
before first use and whenever it fails to produce sufficient power on
jobs that were easily done before. When charging the battery for the
first time, or after prolonged storage, it will only accept an 80% charge.
After several charge and discharge cycles, the battery will attain full
capacity. The battery may become warm while charging; this is
normal and does not indicate a problem.
WARNING: Do not charge the battery at ambient
temperatures below 36° F (2°C) or above 104°F (40°C).
Recommended charging temperature: Approximately 75°F (24°C).
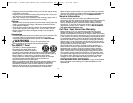
• Note: The charger plug incorporates lock
outs to prevent the use of incorrect
chargers. The plug must be correctly
oriented when inserted.
• Insert the charger plug into the charger
connector at the rear of the tool (fig. D).
• Plug the charger into a 120V outlet.
• Charge the tool for 16 hours before first use.
For catalog numbers GSL35, GSL75:
• The charger indicator light will come on
indicating that the tool is charging.
• When the charge is complete the light will go out.
For catalog numbers GSN30,GSN32, GSN35:
• The charger indicator light will come on indicating that the tool is
charging.
• The light will stay on as long as the charger is connected to the
tool and plugged into a working outlet.
A
B
C
D
5
2
1
4
3
90556224 REV. 1 Garden Shear Manual.qxd: chainsaw booklet new 12/4/09 12:42 PM Page 4


Find Your Products By Category
Please Login
