

0
Owner's of the DeWalt Saw Dewalt Next Gen Circular Saw Kit gave it a score of 0 out of 5. Here's how the scores stacked up:

12
English
As you finish a cut, release the trigger and allow the blade to stop
before lifting the saw from the work. As you lift the saw, the spring-
tensioned telescoping guard will automatically close under the blade.
Remember the blade is exposed until this occurs. Never reach under
the work for any reason. When you have to retract the telescoping
guard manually (as is necessary for starting pocket cuts) always use
the retracting lever.
NOTE: When cutting thin strips, be careful to ensure that small cutoff
pieces don’t hang up on inside of lower guard.
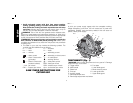
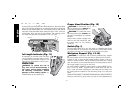
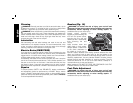
RIPPING (FIG. 17)
FIG. 17
W
Ripping is the process of cutting
wider boards into narrower
strips – cutting grain lengthwise.
Hand guiding is more difficult for
this type of sawing and the use
of D
EWALT DW3278 rip guide
(W) is recommended.
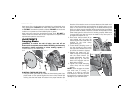
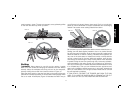
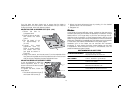
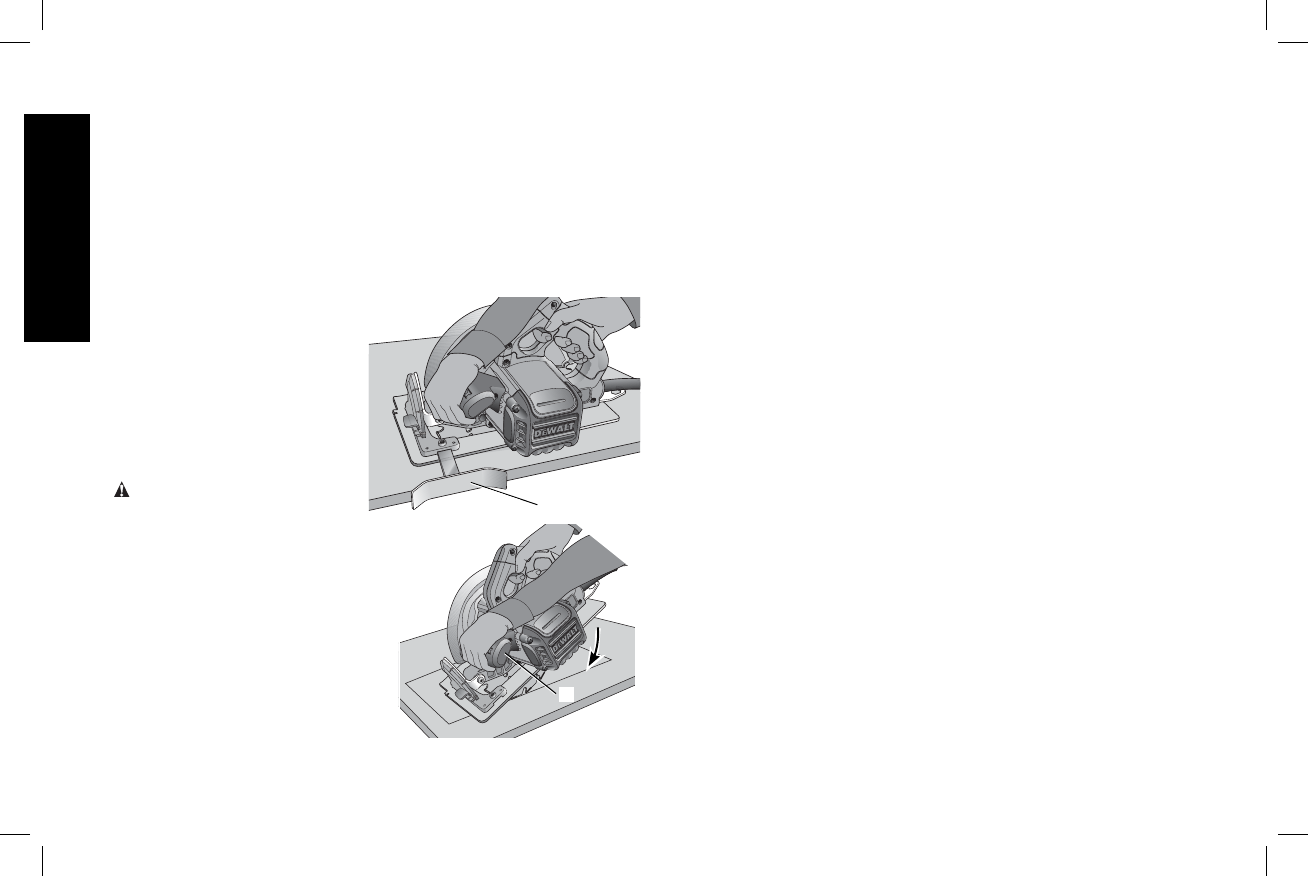
POCKET CUTTING (FIG. 18)
WARNING: Never tie the
blade guard in a raised position.
Never move the saw backwards
FIG. 18
E
when pocket cutting. This may
cause the unit to raise up off the
work surface which could cause
injury.
A pocket cut is one that is made in
a floor, wall or other flat surface.
1. Adjust the saw foot plate so the
blade cuts at desired depth.
2. Tilt the saw forward and rest
front of the foot plate on
material to be cut.
3. Using the lower guard lever, retract lower blade guard to an
upward position. Lower rear of foot plate until blade teeth almost
touch cutting line.
4. Release the blade guard (its contact with the work will keep it
in position to open freely as you start the cut). Remove hand
from guard lever and firmly grip auxiliary handle (E), as shown in
Figure 18. Position your body and arm to allow you to resist
kickback if it occurs.
5. Make sure blade is not in contact with cutting surface before
starting saw.
6. Start the motor and gradually lower the saw until its foot plate rests
flat on the material to be cut. Advance saw along the cutting line
until cut is completed.
7. Release trigger and allow blade to stop completely before
withdrawing the blade from the material.
8. When starting each new cut, repeat as above.
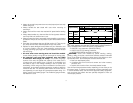
Kickback
When the saw blade becomes pinched or twisted in the cut, kickback
can occur. The saw is thrust rapidly back toward the operator. When
the blade is pinched or bound tightly by the kerf closing down, the
blade stalls and the motor reaction drives the unit backward. When the
blade becomes twisted or misaligned in the cut, the teeth at the back
edge of the blade can dig into the top surface of the wood causing
the blade to climb out of the kerf and jump back toward the operator.
Kickback is more likely to occur when any of the following conditions
exist.
1. IMPROPER WORKPIECE SUPPORT
A. Sagging or improper lifting of the cut off piece can cause
pinching of the blade and lead to kickback (Fig. 14).


Find Your Products By Category
Please Login
