
0
Owner's of the Bayou Classic Cooktop DB250 gave it a score of 0 out of 5. Here's how the scores stacked up:

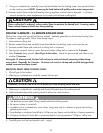

O
N
-
C
O
U
N
T
E
R
-
C
L
O
C
K
W
I
S
E
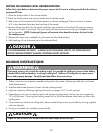
High Pressure
W
ater
TROUBLE SHOOTING TIPS
Sometimes the burner does not light or has a only a meager match flame. Other times, the flame blows
out, bur
ns yellow, or there is a flame inside the burner tube. These symptoms are common and easy to
remedy. The following Trouble Shooting Tips cover most questions and problems associated with outdoor
gas cooker appliances. Save this manual for future reference.
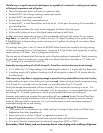
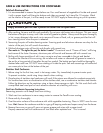
1. SYMPTOM:
Burner lights but the flame remains very small and will not increase for heat-up and cooking.
CAUSE:
Both LP cylinder and regulator couplings contain an EXCESS FLOW safety device that shuts off 90 percent
of gas flow should the hose be cut or severed. Sometimes this safety device can be activated when lighting
the burner. Opening the cylinder valve and/or regulator valve too quickly can create the rapid flow of
gas that activates the excess flow safety device.
POSSIBLE SOLUTION:
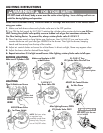
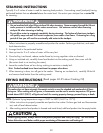
Repeat Lighting Instructions steps 1 through 6
on page 16. Follow lighting instructions and
be certain to S-L-O-W-L-Y open cylinder valve
one full turn, then S-L-O-W-L-Y open regulator
valves when lighting.
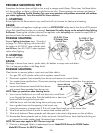
2. SYMPTOM:
Burner will not light.
CAUSE:
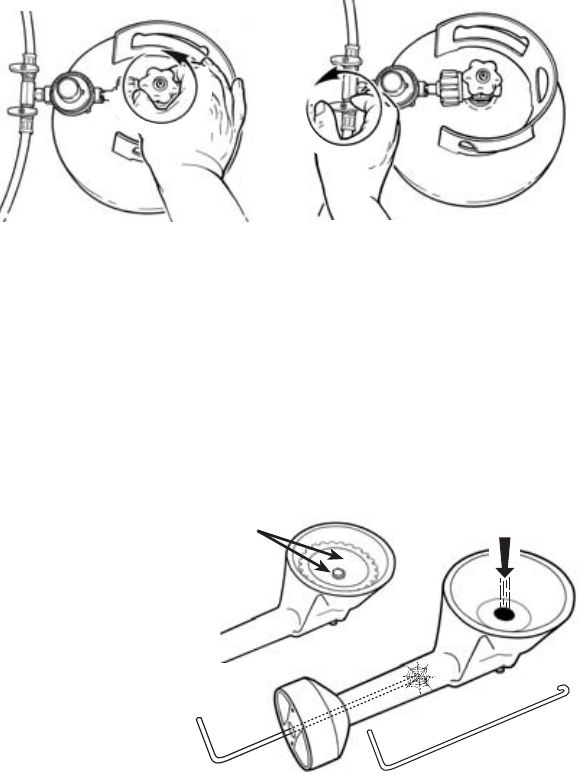
Blockage in burner from insects, spider webs, dirt dobber or wasp nests and debris.
This is a frequent problem in the Deep South.
POSSIBLE SOLUTION:
Clean burner to remove spiders, insect nests and other debris.
1. Turn gas OFF at LP cylinder valve and at regulator control knob.
2. Disconnect regulator hose assembly from burner and remove air control shutter.
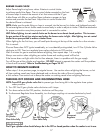
3. Turn cooker frame upside down. Disconnect retaining nut from burner support bar, then remove
burner from frame.
4. Loosen and disconnect central bolt from burner
and remove flame spreader from burner cup.
NOTE: Wear eye protection when cleaning burner.
5. Use a narrow bottle brush or a stiff wire bent into a small hook
to run through the burner tube. Push the bottle brush or bent wire
back and forth through the burner tube.
6. Hold the burner with the tube facing down and spray water
from a garden hose into the opening in the burner cup.
7. It may be necessary to repeat steps 5 & 6 until water flows freely out of the burner tube.
8. Wire brush entire surface of burner to remove food residue and dirt.
9. Wire brush bottom of flame spreader and side ports to be certain all grooves are free of debris.
10. Re-assemble flame spreader and air shutter on burner. Reinstall burner, heat shield and locking nut
on support bar inside cooker stand. Re-connect hose to burner.
NOTE: The same steps apply to BG12 Burner except #4.
11. If burner is damaged, obtain a replacement burner. Model BG10 Burner for DB250 Cooker
Model BG12 burner for DB375 Cooker
S-L-O-W-L-Y Turn
Brass V
alve ON
S-L-O-W-L-Y Turn
LP Cylinder V
alve
One Full Turn
Remove bolt and
flame spreader
4
6
Stiff Wire
with Hook
O
N
-
C
O
U
N
T
E
R
-
C
L
O
C
K
W
I
S
E
BG10
Bur
ner
26


Find Your Products By Category
Please Login
