
2.9
Owner's of the Black & Decker Trimmer AF-100 gave it a score of 2.9 out of 5. Here's how the scores stacked up:

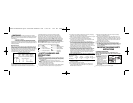
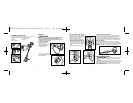

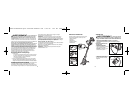

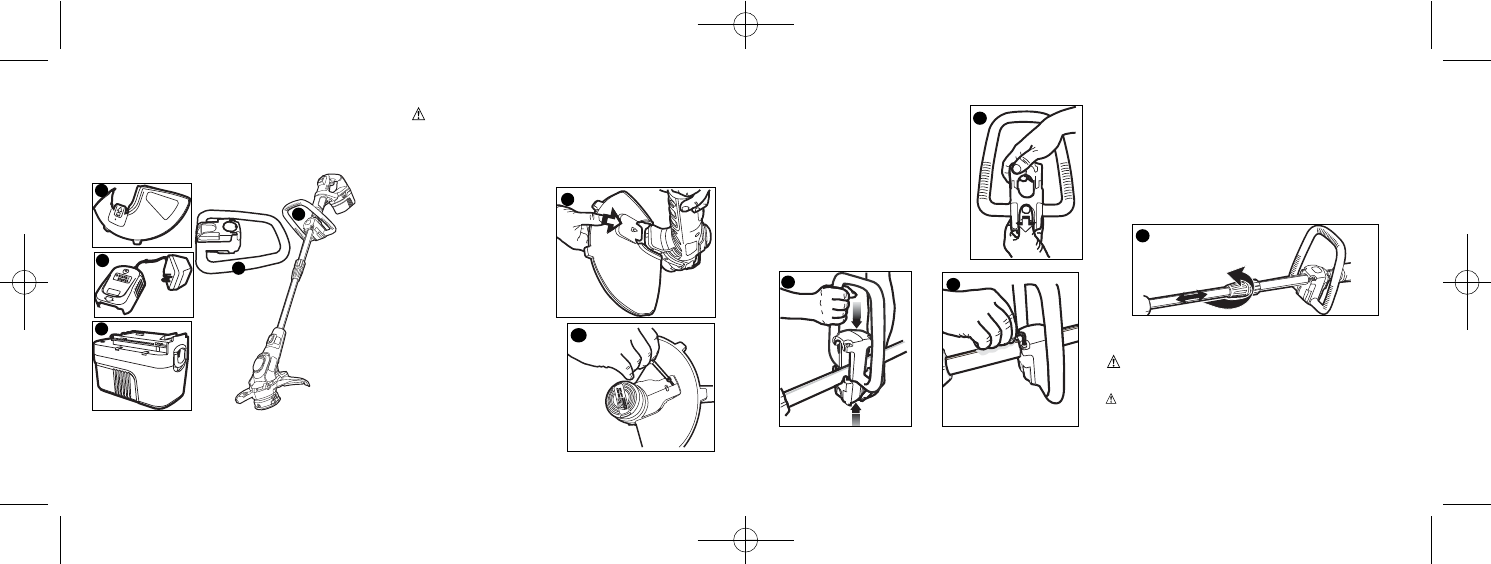
ATTACHING THE AUXILIARY HANDLE
• With the hex wrench supplied, separate
the handle pieces as shown in figure D.
Note: Hex head wrench stores on
trimmer handle above battery.
• Attach the handle to the metal shaft of
the trimmer with the curved edge facing
forward. Push down on the handle so
that it engages with the slot in the shaft.
• Attach the two handle pieces using four
hex head screws as shown in figures E
and F.
• Fully tighten screws with hex wrench.
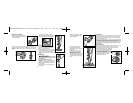
AUXILIARY HANDLE ADJUSTMENT
• For maximum comfort and control, adjust the auxiliary handle to
suit your height. Shorter users adjust handle to a lower position
(away from you) and taller users, adjust handle to an upper
position (towards you). The handle should be adjusted so that your
front arm is straight when the trimmer is in the working position.
HEIGHT ADJUSTMENT
The overall height of the trimmer can be adjusted by loosening the
lock collar and rotating it opposite to the arrow shown in figure G.
The tubes can then be extended shorter or longer. When the desired
height is achieved tighten the collar by rotating in the direction shown
in figure G.
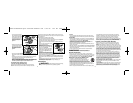
OPERATING INSTRUCTIONS
• WARNING: Always use proper eye protection that
conforms to ANSI Z87.1 (CAN/CSA Z94.3) while operating this
power tool.
• CAUTION: Inspect area to be trimmed and remove any wire, cord,
or string-like objects which could become entangled in the rotating
line or spool. Be particularly careful to avoid any wire which might
be bent outwardly into the path of the tool, such as barbs at the
base of a chain link fence.
E
D
G
C
F
9
8
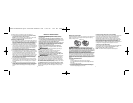
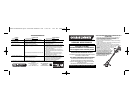
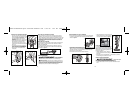
ASSEMBLY INSTRUCTIONS
Before assembling your Cordless String Trimmer, check that you
have received the following in the shipping carton.
1. Guard 4. Auxiliary Handle
2. Charger 5. Trimmer
3. Battery Pack (1)
ASSEMBLY
WARNING:
Remove battery pack from tool before attempting to attach the
guard or make any adjustment. NEVER OPERATE TOOL
WITHOUT GUARD FIRMLY IN PLACE. The guard must always
be on the tool to protect the user.
ATTACHING THE GUARD
• Remove the screw from the
bottom of the guard.
• Insert the guard into the motor
housing (figure B) until it
“snaps” into place.
• Reinsert the screw through the
hole in the guard and tighten as
shown in figure C.
1
4
5
3
2
24v
B
90563738 NST1024.qxd: chainsaw booklet new 5/25/10 1:13 PM Page 8


Find Your Products By Category
Please Login
