

0
Owner's of the Troy-Bilt Remote Starter Troy-Bilt Remote Starter gave it a score of 0 out of 5. Here's how the scores stacked up:


4
OPERATING INSTRUCTIONS
CHARGING THE BATTERY
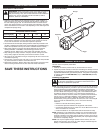
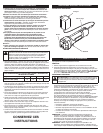
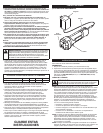
1. Plug the charger into an AC wall outlet /
receptacle.
2. Insert the charger into the back of the unit
(Fig. 1).
3. The red LED will illuminate (Fig. 1).
4. The red LED will turn off when the battery is
fully charged.
5. Disconnect the unit from the charger.
NOTE: The unit may be stored with the charger still attached, but the
charger should be disconnected from the wall outlet / receptacle when
doing so.
NOTE: Lithium-ion batteries, while in use, will continue to provide full power
without power fade, unlike typical batteries; when the battery is fully
discharged, the battery circuitry will immediately cut power to the tool and
require immediate charging.
IMPORTANT! DO NOT use the unit while it is charging. Doing so may
damage the unit and battery.
NOTE: This accessory is to be used on electric start capable units only.
Refer to the Starting Instructions section of the unit’s Operator’s Manual for
proper starting instructions when using this accessory. FOR INTERMITTENT
USE ONLY.
OPERATING THE ELECTRIC STARTER
NOTE: Inspect the unit prior to use. DO NOT use the unit if any part is
damaged in any way. Take to an authorized service dealer for replacement
or repairs.
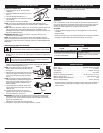
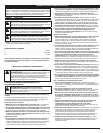
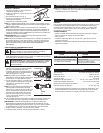
1. Place the electric starter keyed tip into the hole in the rear of the engine,
making sure the engine tabs on the back of the engine are flush with the
indents on the electric starter. (Fig. 2)
NOTE: It may be necessary to slightly twist the
electric starter until the key fits securely into
the engine.
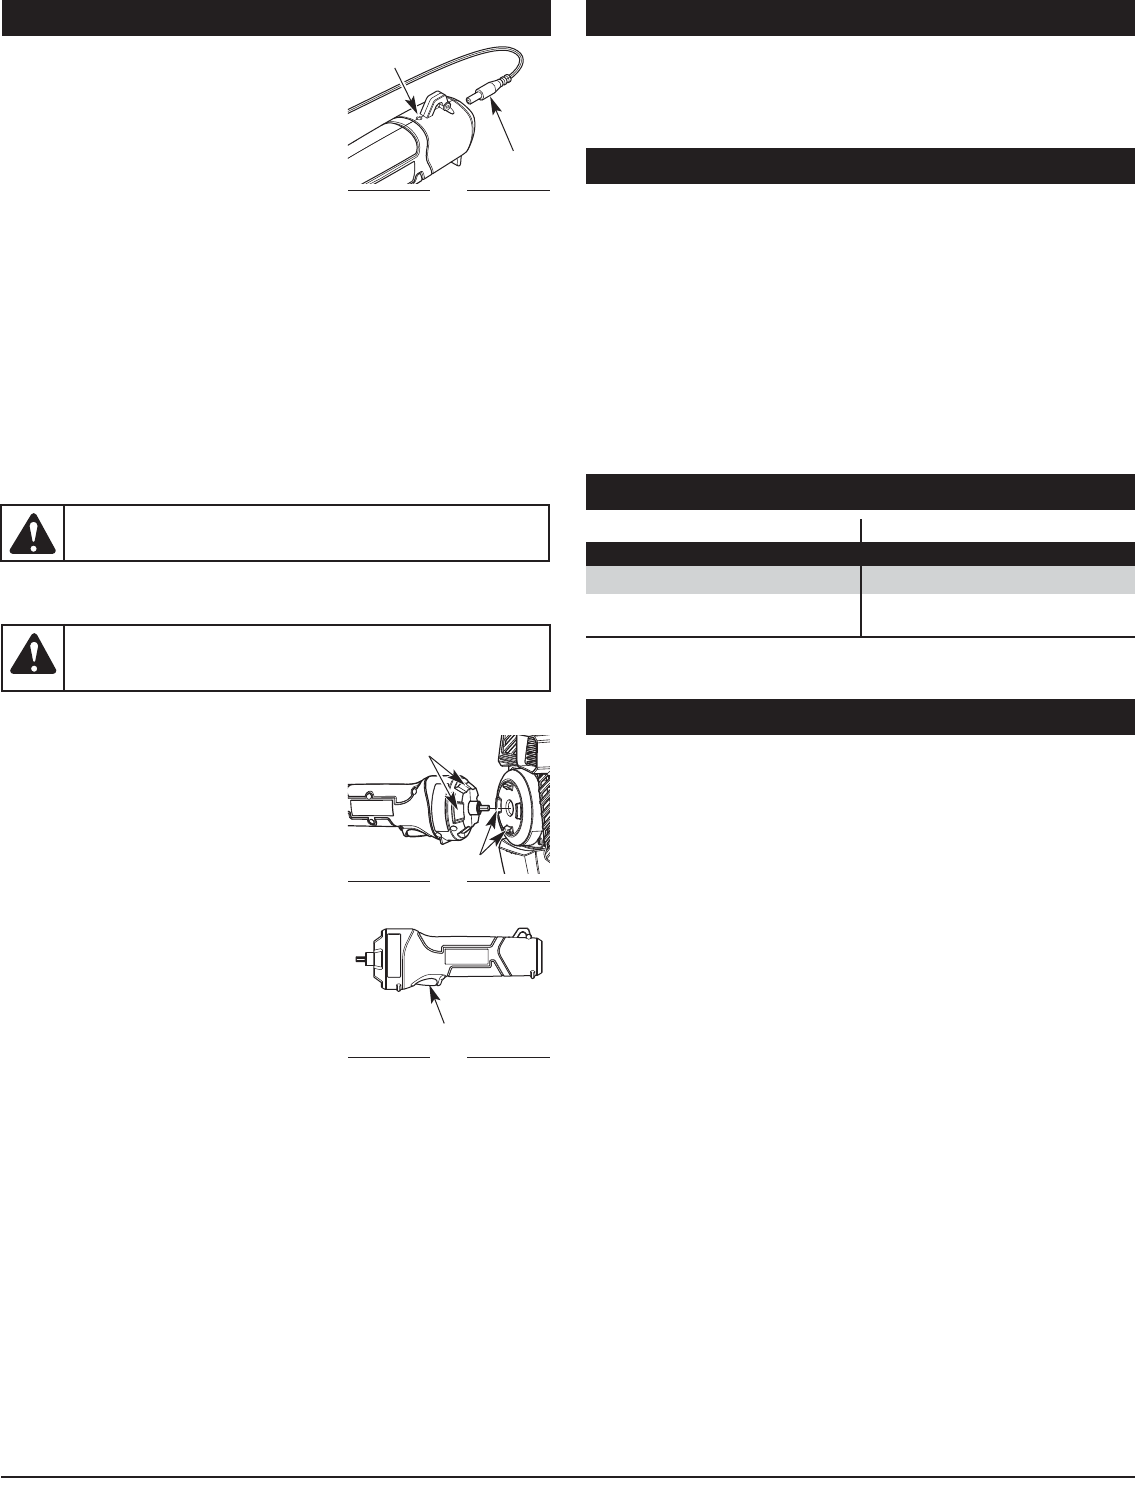
2. With the electric starter flush with the engine,
squeeze the trigger in intervals of no more
than 4 seconds each until the unit starts.
(Fig. 3)
NOTE: The electric starter is designed to be
used intermittently. Squeeze the trigger for no
longer than 4 seconds at a time with a 120
second cooling period in between each
starting attempt.
3. Once the engine has started, remove the
electric starter from the engine. The unit is
ready for use.
If... the electric starter does not turn on or
suddenly stops while in use, wait at least 5
seconds to allow the unit to cool.
IMPORTANT! The battery is equipped with an internal circuit breaker that
will automatically shut off power to the unit if the battery is overloaded
during heavy use. Once cooled, the battery will reset itself. Follow these
steps if an overload occurs:
1. Release the trigger and then restart the unit.
2. The battery may need to cool for approximately 1 minute.
WARNING: To avoid serious personal injury and unit damage do
not use the electric starter in damp or wet locations, in rain or snow.
WARNING: A damaged unit may cause serious personal injury
due to electrical shock. DO NOT use until the unit is repaired or
replaced by an authorized service dealer.
Fig. 2
Engine Tabs
Indents
CAUSE ACTION
The battery lacks sufficient charge Charge the battery
The unit is overheated
Allow the unit to cool for at least 5
seconds
ELECTRIC STARTER WILL NOT TURN ON
TROUBLESHOOTING
CLEANING AND STORAGE
CLEANING
Use a small brush to clean off the outside of the unit and keyed tip. Do not
use strong detergents. Household cleaners that contain aromatic oils such
as pine and lemon, and solvents such as kerosene, can damage plastic
housing or handle. Wipe off any moisture with a soft cloth.
STORAGE
• Check unit before storage to be sure the equipment is in safe working
condition.
• Stop the motor.
• Store the unit indoors, in a dry and locked place, out of the reach of children.
• Maintain or replace safety and instruction labels, as necessary.
MAINTENANCE AND REPAIR INSTRUCTIONS
NOTE: This unit was designed to not have any serviceable parts and should
ONLY be repaired by an authorized service dealer.
SPECIFICATIONS*
Motor Type. . . . . . . . . . . . . . . . . . . . . . . . . . . . . . Cordless, Battery-powered
Motor Voltage . . . . . . . . . . . . . . . . . . . . . . . . . . . . . . . . . . . . . . . . . 12 V max.
Unit Weight . . . . . . . . . . . . . . . . . . . . . . . . . . . . . . . . . . . . 1.66 lbs. (0.75 kg)
Charge Time . . . . . . . . . . . . . . . . . . . . . . . . . . . . . . . . . . . . . . . . . . 3-5 Hours
Optimum Charging Temperature . . . . . . . . . . . . . 32° to 104° F (0° to 40° C)
Battery Charger Input . . . . . . . . . . . . . . . . . . . . . . . . . . 120 V 60 Hz AC only
Battery Charger Output Maximum. . . . . . . . . . . . . . . . . . . . . . . . . . . . . . 12 V
Battery Charger Weight . . . . . . . . . . . . . . . . . . . . . . . . . . . . 0.6 lbs. (0.27 kg)
Fig. 3
Trigger
* All specifications are based on the latest product information available at
the time of printing. We reserve the right to make changes at any time
without notice.
Fig. 1
Charger
Red LED


Find Your Products By Category
Please Login
