
0
Owner's of the Black & Decker Laser Level AUTO LASER LEVEL gave it a score of 0 out of 5. Here's how the scores stacked up:


5
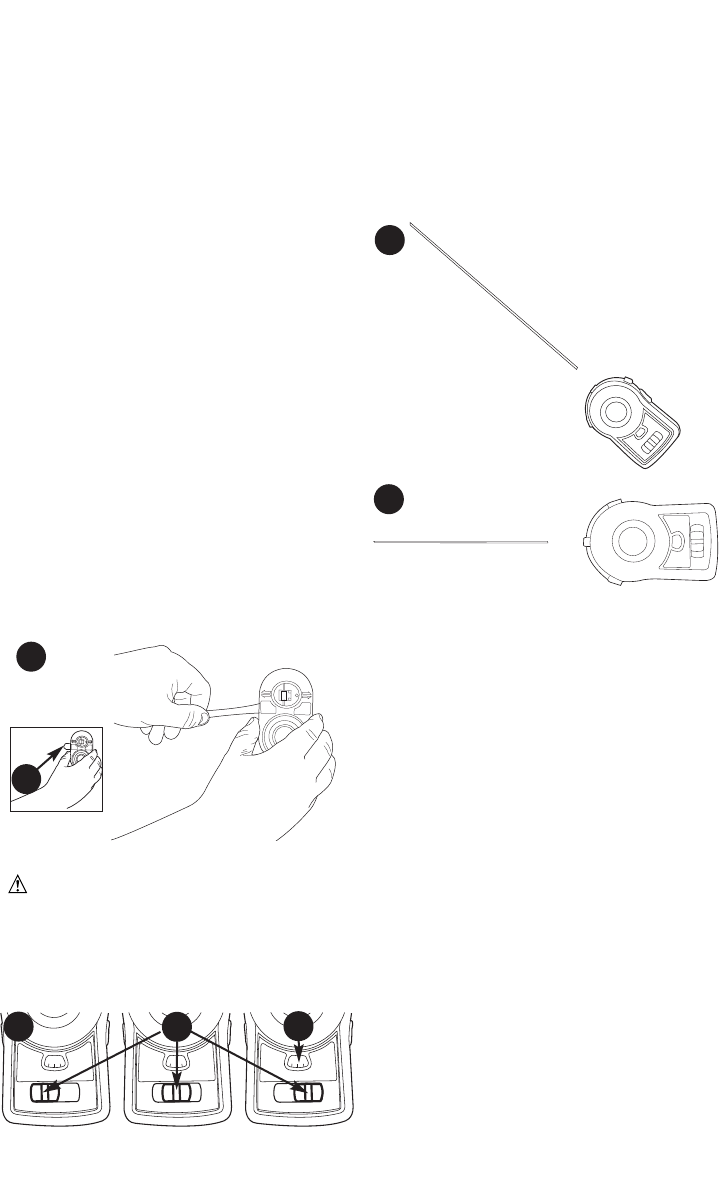
• Slide the actuator all the way to the right
to activate the self leveling mode.
• Slide the actuator all the way to the left to
turn the laser off.
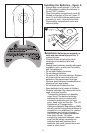
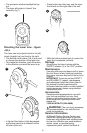
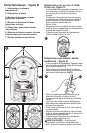
Protractor Mode
The internal protractor (2) (figure f) of the
BDL170 can be used to:
• Transfer an angle
• Apply an angle (Example : transfer stair
angle to align pictures on stairs wall)
Using the Protractor - figure G, H
• Hang the laser on the wall surface using
one of the 3 different hanging modes or
hand hold it on the wall.
• Slide the on/off actuator (1) to the middle
position.
• The laser will come on and project a laser
line.
• It will be locked in one position.
• The protractor (2) back light will come on.
• The protractor window will show an angle
relative to vertical.
• The unit can be spun around 360
degrees, and the angle reading can be
taken from the window.
• The angle can then be transferred to
another work area.
• Although the laser direction can be
changed from vertical to left or right in
“Protractor Mode”, for best results, it
should be set to the vertical position.
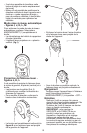
Auto Leveling Mode - figure
I,J,K,L,M
To activate the Self Leveling Mode, slide
the ON/ OFF actuator (1) all the way to
the right.
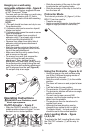
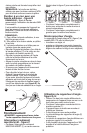
Hanging on a wall using
removable adhesive strip - figure E
NOTE: Black & Decker suggests the use
of 3M
®
Command
®
Strips.
The laser unit can be hung on a wall using
a removable adhesive strip (7) that is
attached to the back of the wall mounting
attachment.
NOTE:
1.) The wall should be clean and dry to use
the adhesive strip.
2.) Adhesive strip can be used on drywall,
plaster and wood.
3.) Adhesive strip cannot be used on some
types of wallpaper.
• Remove liner paper from one side of
adhesive strip (7) and apply strip to back
of wall mounting attachment (6).
• Remove liner paper from other side of
adhesive strip and press attachment
firmly onto wall.
• Align the circular pocket on the back of
the laser with the magnetic circle on the
front of the wall attachment.
• Make sure that the unit is seated firmly,
and is secure on the wall.
• To remove from wall, first remove the
laser unit from the wall mounting
attachment. Then, holding the wall
attachment with one hand, slowly stretch
the adhesive strip straight along the wall
away from the wall mounting attachment
until it releases from the wall (figure E).
Do not pull strip at an angle.
Operating Instructions
DANGER: Laser Radiation, avoid
direct eye exposure.
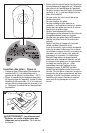
On/Off Actuator - figure F
• Slide the ON/OFF actuator (1) to the
middle position shown in figure F to turn
the laser on in a locked position.
H
G
F
E
1
2
7


Find Your Products By Category
Please Login
