
0
Owner's of the Campbell Hausfeld Car Stereo System NOT FOUND gave it a score of 0 out of 5. Here's how the scores stacked up:
22 Sp
Pistola Pulverización de Uso General
Mantenimiento
(Continuación)
se dañaría ya que sería muy dificil de
quitarle la pintara endurecida dentro
de dichos ductos.
NOTA: En las siguientes instrucciones,
la palabra “solvente” se refiere al
solvente adecuado para cada material
que haya usado (por ejemplo: thinner
para lacas, etc).
1. Las pistolas pulverizadoras con
envase—Desconecte el envase y
vacíelo, después enjuaguélo con un
solvente recomendado para la
pintura o material que haya usado.
2. Llene el envase de solvente y
conéctelo a la pistola. Rocíe el
solvente con la pistola y agítela con
fuerza al mismo tiempo. Limpie el
exterior de la pistola con un trapo
empapado de solvente. Repita estos
pasos hasta que la pistola esté limpia.
3. Quítele la tapa de aire y remójela en
solvente para limpiarla. Use un
cepillo pequeño para quitarle las
manchas difíciles de sacar. Puede usar
palillos o cepillos pequeños para
limpiar los ductos de aire; sin
embargo,
NUNCA USE OBJETOS DE
METAL PARA LIMPIAR LOS DUCTOS
QUE HAN SIDO TALADRADOS CON
PRECISION. SI ESTOS SE DAÑAN EL
ROCIO SERA INADECUADO.
4. Limpie los empaques con un trapo
empapado en solvente. Para evitar
que el equipo se dañe,
No sumerja
los empaques o la pistola en el
solvente.
5. Después de usar agua para limpiar la
pistola cuando haya usado pinturas a
base de agua, rocíe aguarrás para
evitar que la pistola se oxide.
6. Use aceite sin silicón para lubricar
todas las piezas movibles antes de
ensamblar la pistola. Use Vaselina o
grasa liviana para lubricar todas las
conexiones con roscas antes de
almacenar la pistola.
7. Limpie bien la pistola para eliminar
todos los contaminantes que podrían
oxidar la pistola pulverizadora.
PARA LIMPIAR LA PISTOLA DESPUES DE
USARLA CON UN TANQUE DE PINTURA
Cierre el suministro de aire al
tanque y libere toda la
presión del tanque.
1. Abra el orificio de desfogue del
tanque de pintura. Si está usando
una tapa de aire de mezcla externa,
aflójela un poco.
2. Reduzca la presión de aire a 0,69 -
1,38 bar. Cúbrale los orificios a la
tapa de aire con un trapo y oprima el
gatillo. El aire se regresará a través
de la boquilla forzando a la pintura
hacia el tanque.
3. Vacíe el tanque y límpielo con un
trapo empapado en solvente.
4. Vierta suficiente solvente en el
tanque para limpiar a fondo la
manguera y la pistola. Cierre el
tanque y comience a rociar hasta que
el solvente salga limpio.
5. Desconecte la manguera de material
y séquela con aire comprimido para
sacarle los residuos de solvente.
Cuando
le
aplique aire comprimido a la manguera,
para secarla, cerciórese de mantenerla
alejada de cualquier persona para
evitar que le caigan residuos de
solvente en los ojos y la piel
ocasionandole heridas.
LIMPIEZA PERIODICA
De vez en cuando deberá inspeccionar
y limpiar el interior y exterior de la
pistola para quitarle los residuos de
pintura y acumulaciones de polvo.
1. Examine los orificios de la tapa de
aire y la boquilla. Si están obstruídos,
quítele los anillos en O y sumerja la
tapa de aire o la boquilla en
solvente.
2. Puede utilizar un cepillo, palillo u
otro objeto similar para sacar la
pintura seca de los orificios o ductos.
NUNCA USE OBJETOS DE METAL
PARA LIMPIAR DUCTOS
TALADRADOS A PRESICION. SI
ESTOS SE DAÑAN PODRIA
AFECTAR EL ROCIO.
!
ADVERTENCIA
!
ADVERTENCIA
3. Desconecte y revise la aguja de ajuste
para ver si está muy desgastada o
torcida.
IMPORTANTE: Si el extremo de la
aguja está más desgastado en un lado,
la aguja está torcida o la pistola está
desalineada debido a un golpe o una
caida. Si la pistola está torcida no podrá
repararla. Para probar la aguja,
deslicéla sobre una superficie plana.
Reemplácela si es necesario.
4. Chequée y reemplace los anillos y sellos
dañados. Éstos se pueden limpiar pero
no los debe sumerjir en solvente.
5. Sáquele las tuercas que sostienen los
empaques y reemplácelos SOLO si no
puede eliminar la fuga de material
después de apretar las tuercas. No
apriete demasiado estas tuercas ya
que podría restringir el movimiento
de la aguja.
6. Ensamble las piezas en orden
contrario a lo anterior y use aceite sin
silicón en las piezas movibles.
Aplíquele Vaselina o grasa liviana a
las conexiones con roscas y a las de
las mangueras.
PARA ALMACENAR
1. Cuando no vaya a usar la pistola
pulverizadora, gire la perilla de
control de fluído en sentido
contrario a las agujas del reloj para
reducir la tensión del resorte sobre
la aguja.
2. La pistola pulverizadora
DEBE estar
bien limpia y ligeramente lubricada.
connected as shown in Figure 4. This
will prevent pressurized air from
escaping out of the canister pressure
valve port when the canister is not
used.
NON-BLEEDER TO BLEEDER
CONVERSION
IMPORTANT:
Spray guns except Model
DH3200 are shipped for non-bleeder
operation. The DH3200 model is not
convertible
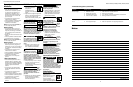
MODELS DH3800/DH4200
(See Figure 5)
1. Remove fluid control knob, large
spring and fluid needle.
2. Remove and retain small spring or
place inside large spring to store.
3. Reassemble unit by reversing step 1.
MODEL DH5300/IFS530
(See Figure 6)
1. Remove spray gun from air supply.
2. Remove fluid control knob and the
fluid needle spring.
3. Remove air valve spring and store
the spring in a safe place so it can be
instructions supplied with the paint
tank for connections and usage.
DO
NOT USE A PAINT TANK WITHOUT
READING THOSE INSTRUCTIONS
.
Prepare the spray guns for use with the
paint tank as follows:
MODEL DH4200
1. Remove canister.
2. Unscrew the material tube.
3. Unscrew canister top and O-ring.
4. Remove setscrew from hole in
canister cover.
5. Remove air cap to expose the fluid tip.
6. Locate the small tapped hole below
the fluid tip and assemble the
setscrew into this hole.
7. Fasten the material hose from the
paint tank to the gun body in place
of the canister.
NOTE: Be sure to use the adapter (Ref.
No. 26) pictured on the exploded view
of the replacement parts list when
attaching the material hose.
MODEL DH5300/IFS530
1. Remove the canister.
2. Unscrew the material tube.
3. After the tube is removed, locate the
brass locknut and remove the nut
using a 14 mm hex socket.
4. Remove the canister top and gasket.
5. Attach the material hose from the
paint tank to the spray gun.
6. Pressure/siphon valve knob must be
tightened clockwise (S direction)
when using a pressurized paint tank
3
Set Up (Cont.)
FLUID FEED
MODEL DH3200/DH3800
This model is capable of pressure feed
only.
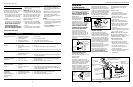
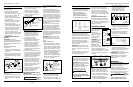
MODEL DH4200
This model is capable of pressure or
siphon feed. Standard set-up is
pressure feed mode; change to siphon
mode for a finer finish using light
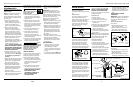
materials. To change modes, remove
setscrew from the canister top and
place in the lower part of the gun
head (See Figure 2).
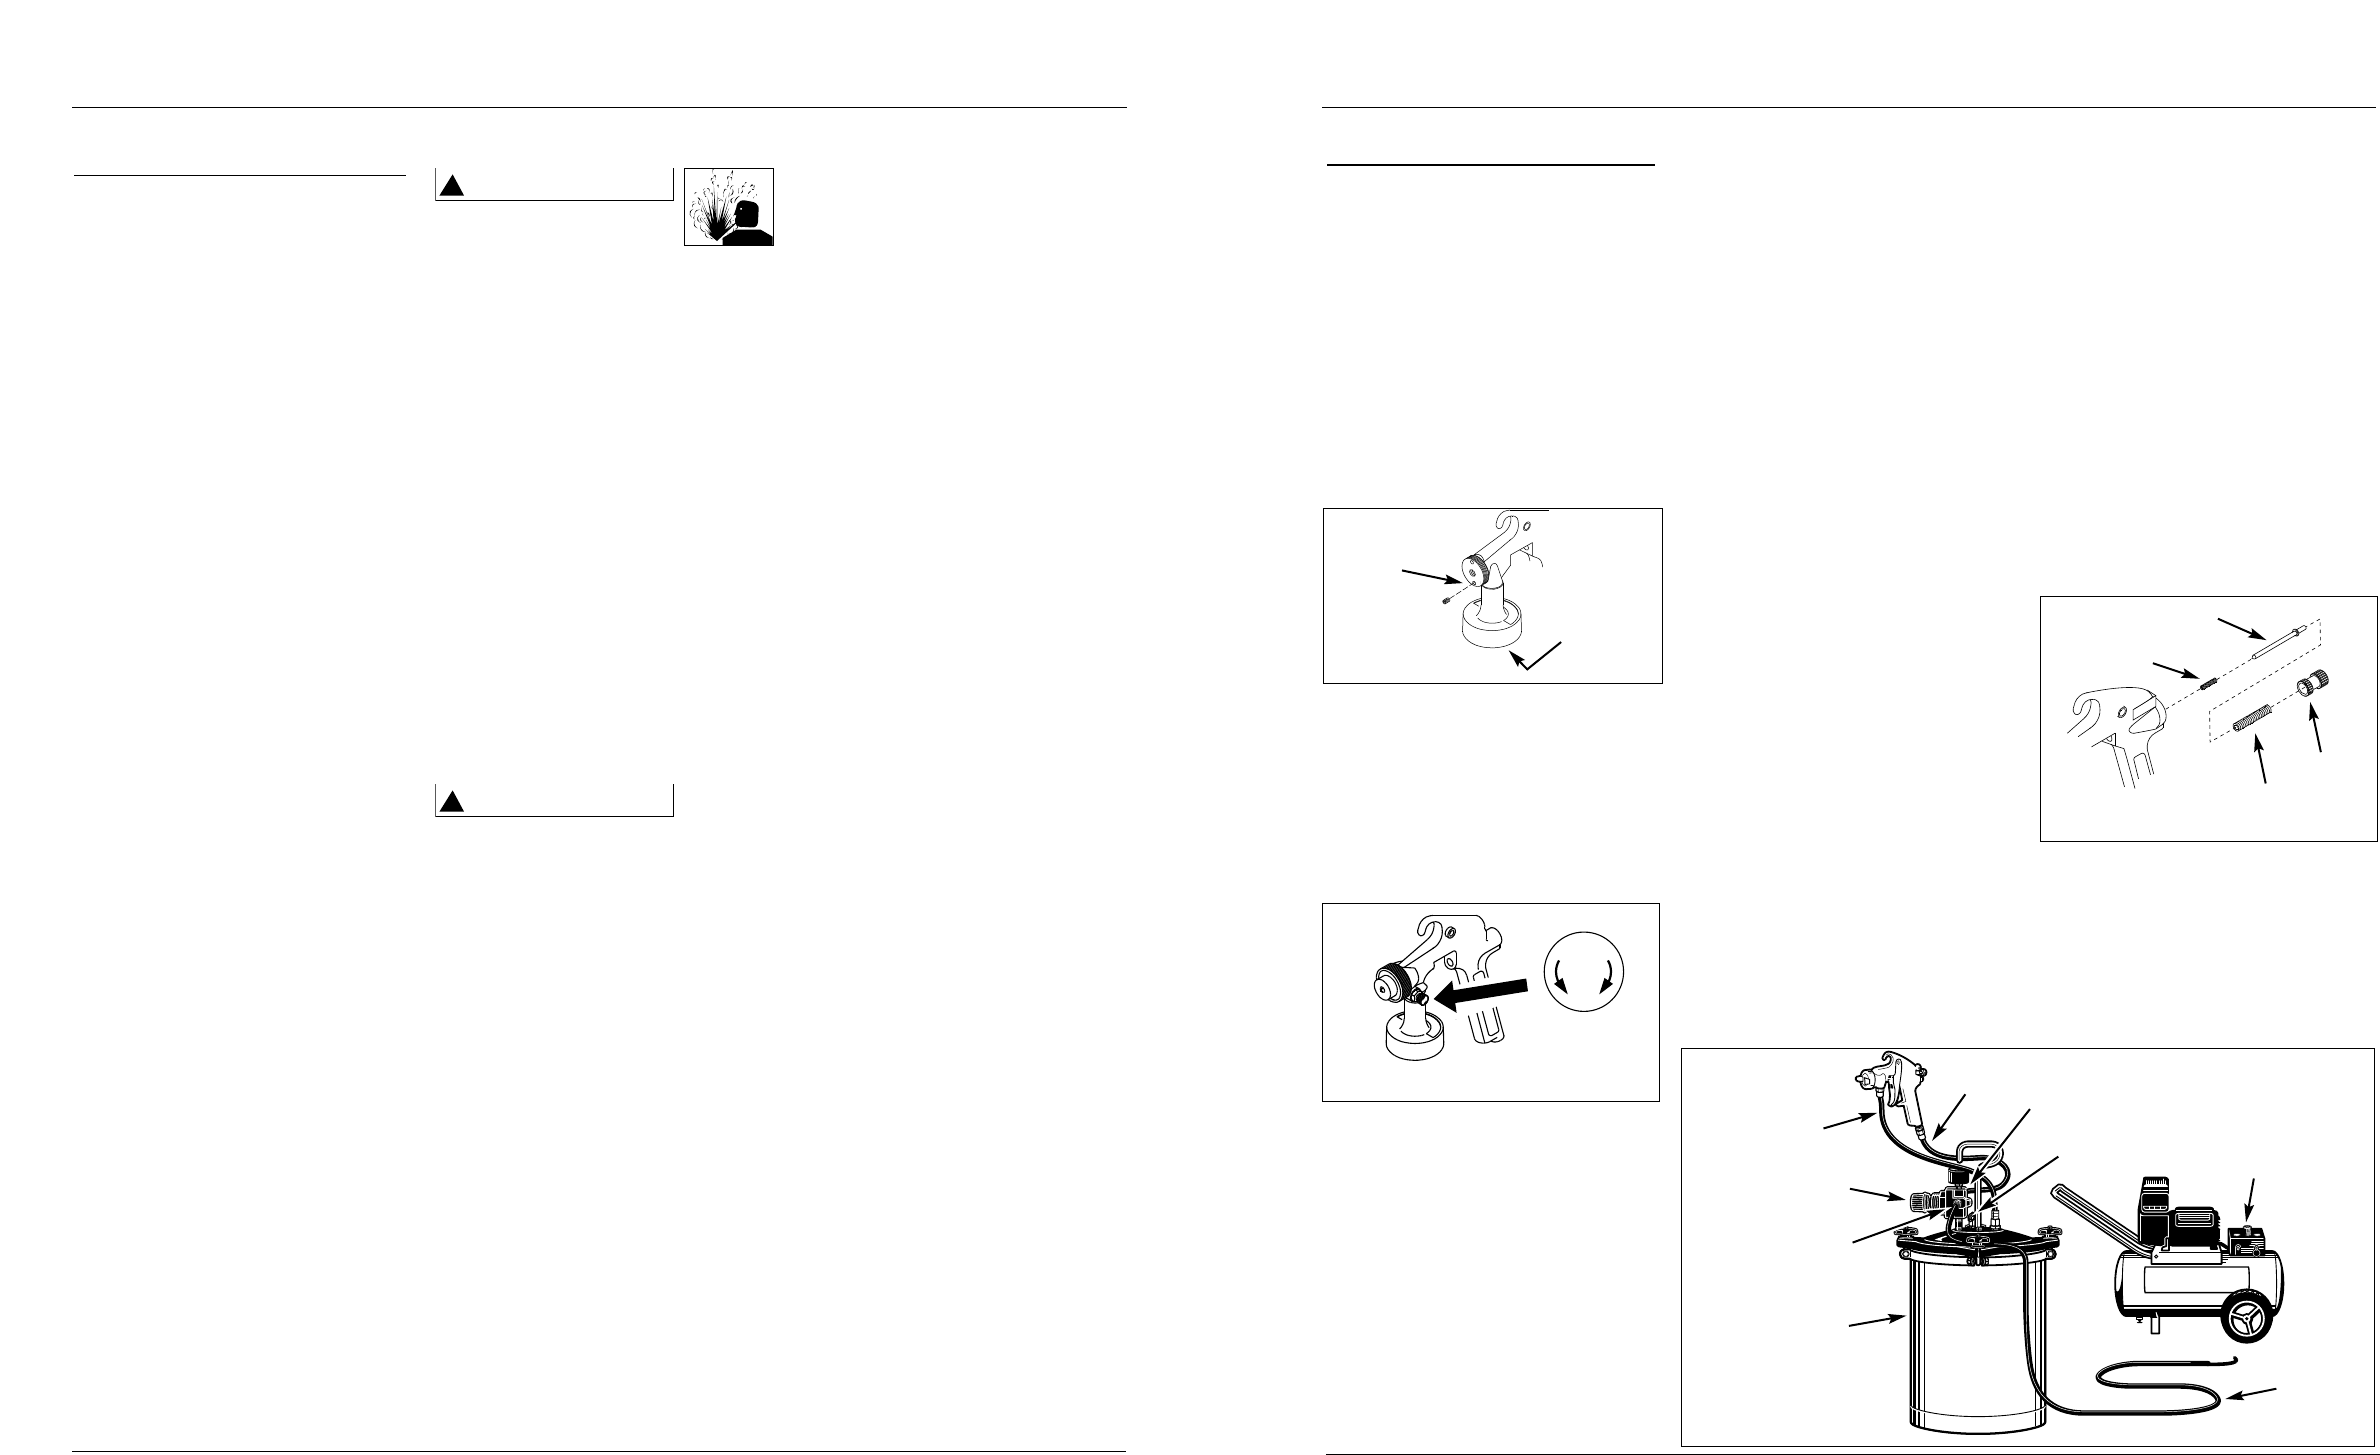
MODEL DH5300/IFS530
This model is capable of pressure or
siphon feed. The gun is shipped in
siphon feed mode but should be
checked before use to ensure the
desired feed method is selected. The
feed method is easily changed by fully
turning the side knob (See Figure 3).
USING A PRESSURIZED PAINT TANK
All of the spray guns in this manual
except Models DH3200 and DH3800
are readily adaptable for use with a
pressurized paint tank. This allows
continuous spraying of large quantities
of paint without stopping. It also
allows the gun to be used while being
held in ANY position without spilling
paint.
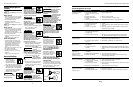
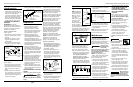
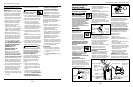
The proper connections to make when
using a pressurized paint tank are as
illustrated in Figure 4. Refer to the
Figure 4 - Paint Tank
Connections
Paint Tank Regulator
Safety Valve
Air Hose
Paint Tank
Material Hose
Air Hose
High - Out To Spray Gun
High - In from
compressor
Air Source
Regulator
Place
setscrew
in lower
hole
Remove from
underside of
canister top
Figure 2
Models DH3200, DH3800, DH4200, DH5300, IFS530
S
P
P
S
Figure 3 - Changing feed method
www.chpower.com
Fluid
Control
Knob
Fluid Needle
Large Spring
Small Spring
Figure 5


Find Your Products By Category
Please Login
