
0
Owner's of the Campbell Hausfeld Car Stereo System NOT FOUND gave it a score of 0 out of 5. Here's how the scores stacked up:
INSTRUCCIONES.
Pasos a seguir para usar las pistolas
pulverizadoras con un tanque de
pintura:
MODELO DH4200
1. Desconéctele el envase.
2. Desconéctele el tubo de material.
3.
Desconecte la parte superior del
envase y el anillo en O.
4. Desconecte el tornillo ubicado en la
tapa del envase.
5. Desconecte la tapa de aire para
tener acceso a la boquilla de fluído.
6. Ubique el orificio pequeño ahusado
ubicado en la parte inferior de la
boquilla de fluído y conecte el
tornillo allí.
7. Conecte la manguera de material del
tanque de pintura a la pistola en vez
de conectarla al envase.
NOTA:
Asegúrese de usar el adaptador
(No. de ref. 26) mostrado en la vista
ampliada de la lista de repuestos, cuando
conecte la manguera de material.
MODELO DH5300/IFS530
1. Desconéctele el envase.
2. Desconéctele el tubo de material.
3. Después de desconectar el tubo,
busque la tuerca de bronce y sáquela
con un dado hex de 14 mm.
4. Desconecte la parte superior del
envase y el empaque.
5. Conecte la manguera de material del
tanque de pintura a la pistola
pulverizadora.
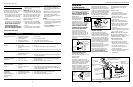
MODELO DH5300/IFS530
Este modelo se puede usar con los
sistemas a presión o de sifón. Viene de
fábrica lista para usarse con el sistema
de sifón, pero debe chequearla antes de
usarla para cerciorarse de que esté lista
para funcionar con el método deseado.
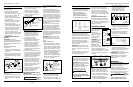
Para hacer el cambio de un método a
otro sólo debe girar completamente la
perilla lateral (Vea la Figura 3).
PARA USAR UN TANQUE DE
PINTURA A PRESION
Todas las pistolas pulverizadoras
descritas en este manual, excepto el
Modelos DH3200 y DH3800, se pueden
adaptar facilmente para usarse con un
tanque de pintura a presión. Ésto le
permite aplicar grandes cantidades de
pintura continuamente sin necesidad
de parar. Igualmente, le permite usar
la pistola en CUALQUIER posición sin
que la pintura se derrame.
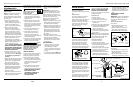
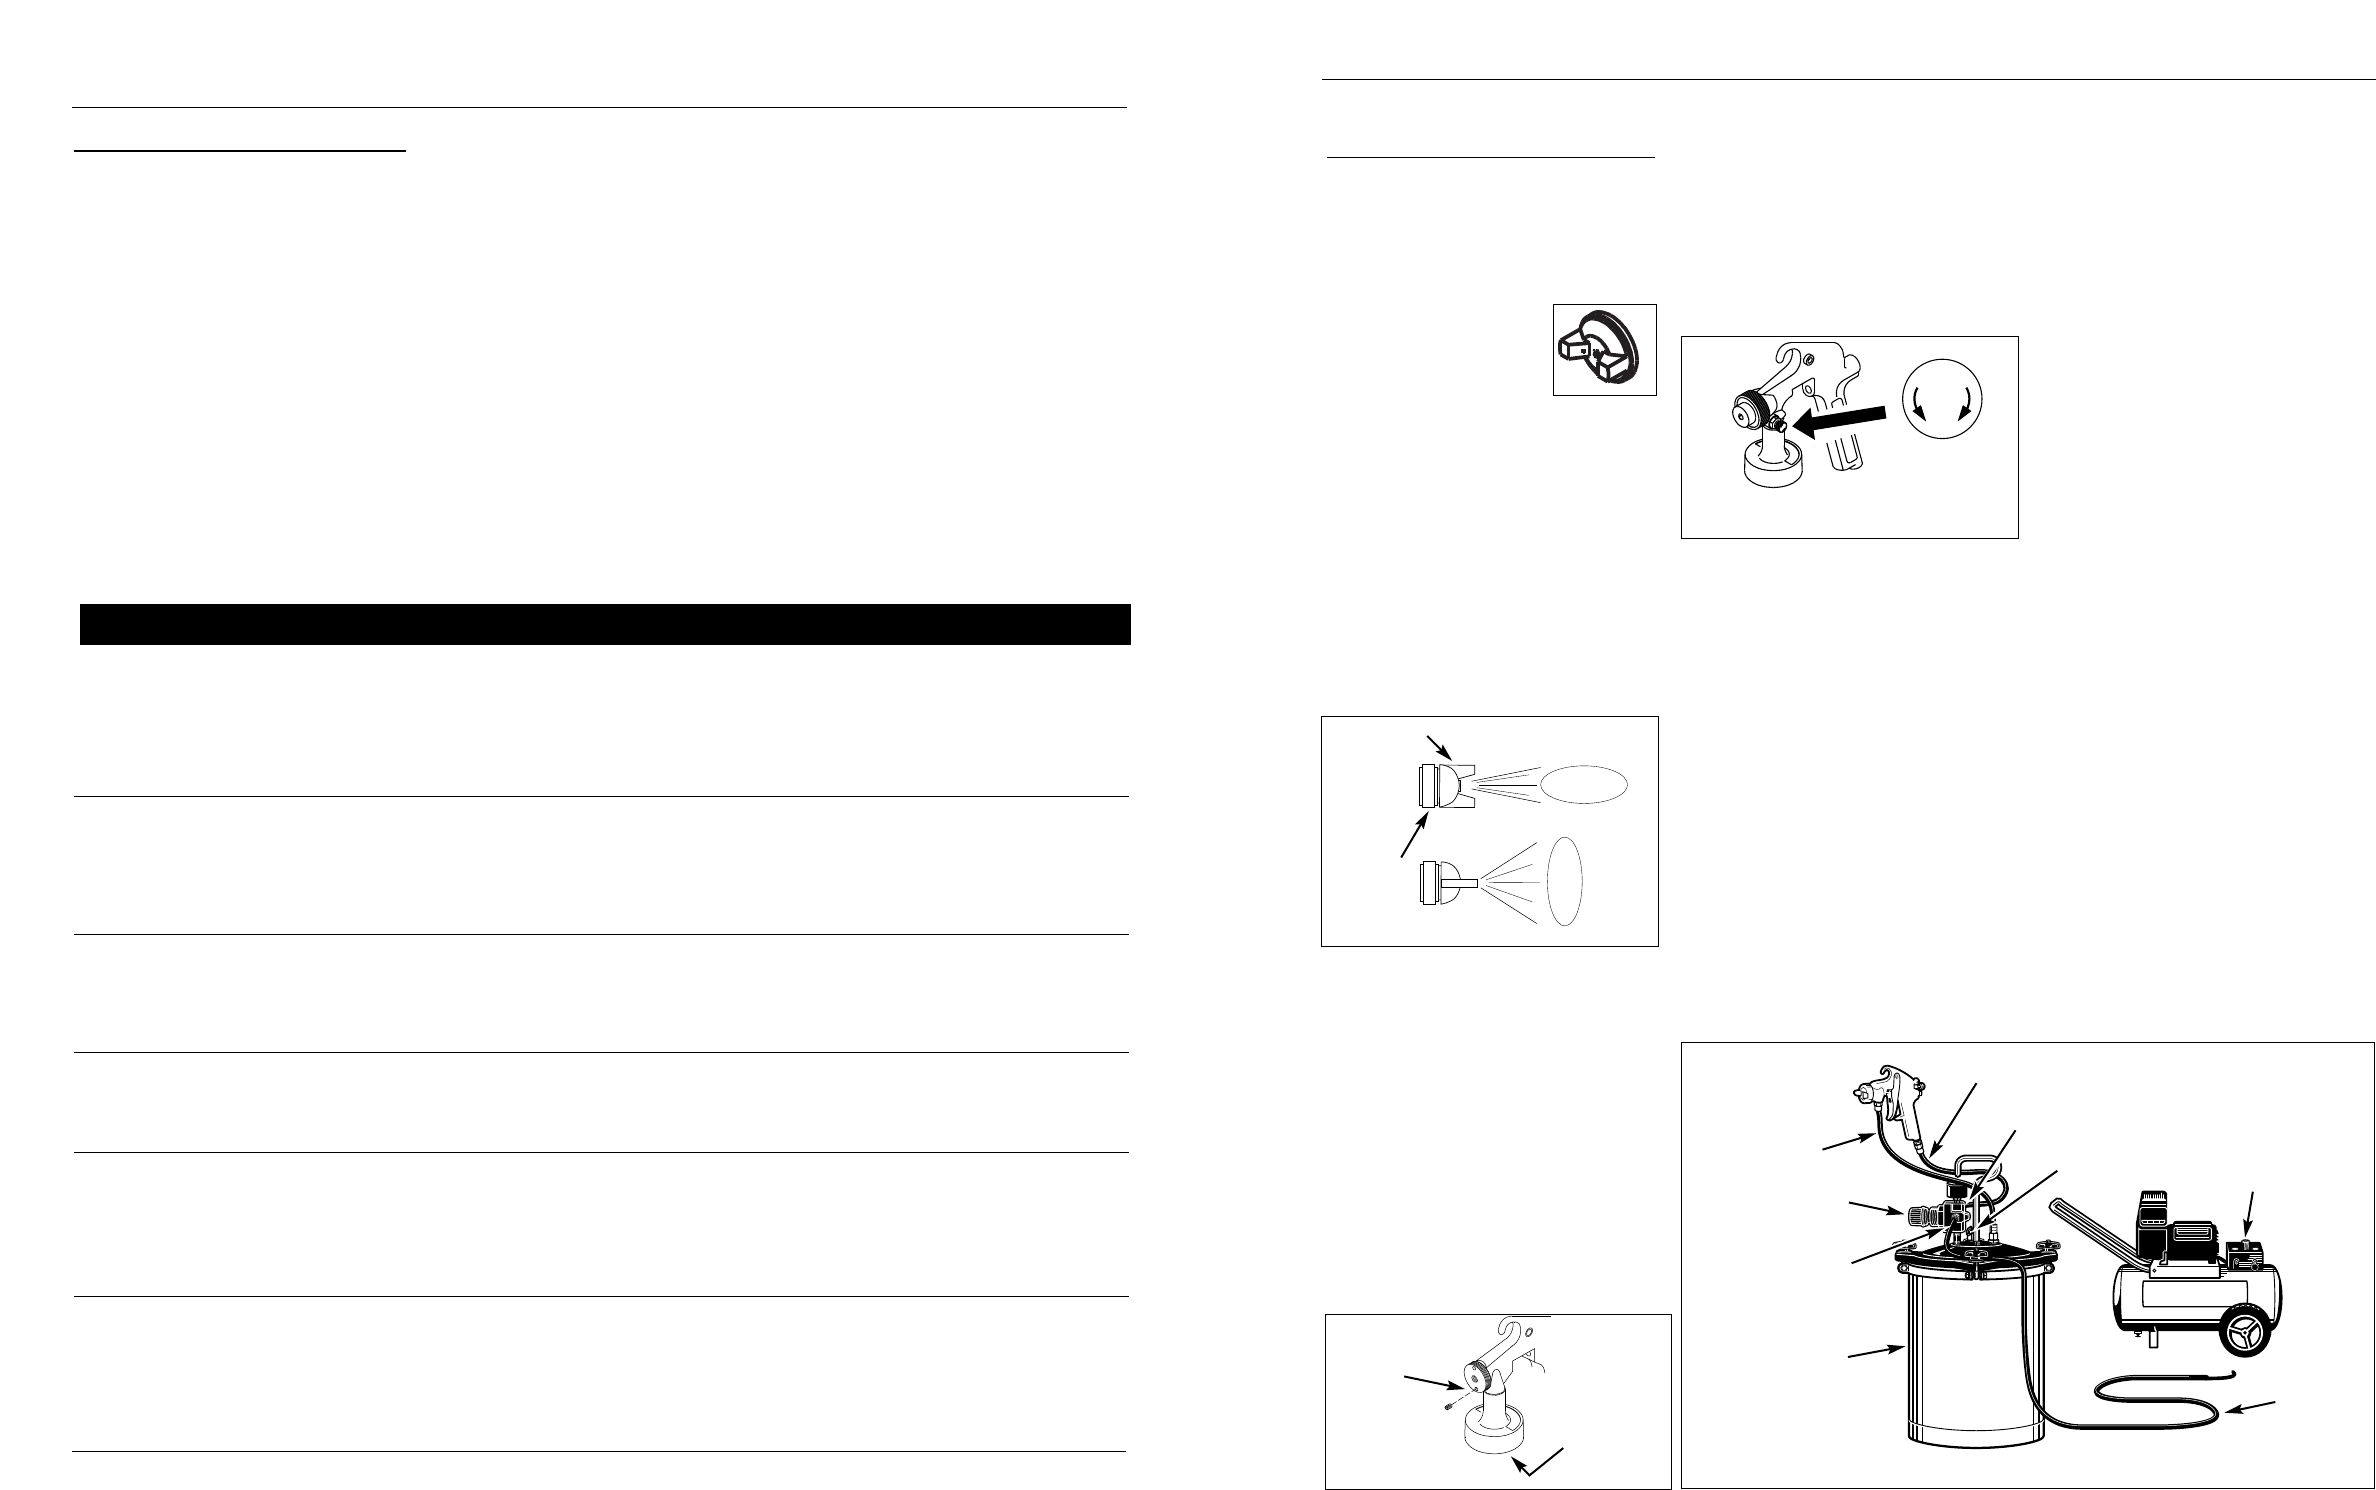
La figura 4 le muestra cómo conectar la
pistola cuando vaya a usar un tanque
de pintura a presión. Vea las
instrucciones suministradas con el
tanque acerca de cómo conectarlo y
usarlo.
NO USE TANQUE DE
PINTURA ANTES DE LEER DICHAS
19 Sp
Modelos DH3200, DH3800, DH4200, DH5300, IFS530
Instalación
(Continuación)
DEBE usar para aplicar pinturas que se
sequen rápidamente ni lacas ya que
éstas obstruirían el orificio de la tapa
de aire.
LAS TAPAS DE AIRE DE
MEZCLA INTERNA SE DEBEN USAR
CON LOS SISTEMAS A PRESION
.
Mezcla Externa—
Generalmente se usa para
aplicar pinturas que se
secan rápidamente,
materiales que no sean
espesos tales como lacas y esmaltes
sintéticos. Este método es mejor para
trabajos de acabado finos.
ESTAS
TAPAS SE PUEDEN USAR CON
SISTEMAS DE SIFON O PRESION.
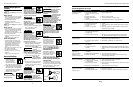
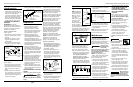
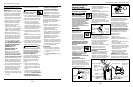
DIRECCION DEL MOVIMIENTO
La dirección del movimiento
(horizontal o vertical) se puede
cambiar con sólo aflojar el anillo de
seguridad y girar la tapa de aire 90
grados (Vea la Figura 1). Apriete el
anillo con la mano después de cambiar
la dirección.
ALIMENTACION DEL FLUIDO
MODELO DH3200/DH3800
Este modelo sólo se puede usar con el
sistema a presión.
MODELO 4200
Este modelo se puede usar con los
sistemas a presión o de sifón. Viene de
fábrica lista para usarse con el sistema a
presión; cámbiela al sistema de sifón
para lograr un acabado más fino
usando materiales que no sean espesos.
Para hacer este cambio, sáque el
tornillo en la parte superior del envase
y conéctelo en la parte inferior de la
cabeza de la pistola (Vea la Figura 2).
Figura 1
Movimiento
Horizontal
Movimiento Vertical
Tapa de Aire
Anillo de
Seguridad
Coloque
el tornillo
en el
orificio
inferior
Desconéctelo
del extremo
inferior de la
parte superior
del tanque
Figura 2
S
P
P
S
Figura 3 - Para cambiar el método
de alimentación
Figura 4 - Conexiones del Tanque de Pintura
Regulador del Tanque
de Pintura
Válvula de Seguridad
Manguera de Aire
Tanque de
Pintura
Manguera
de Material
Manguera
de Aire
Salida de Alta Presión Hacia
la Pistola Pulverizadora
Entrada de Alta
Presión Desde el
Compresor
Regulador de la
Fuente de
Suministro de Aire
6
General Purpose Spray Guns
Maintenance (Cont.)
PERIODIC CLEAN-UP
Due to dirty, lumpy paint etc., it may be
necessary to inspect and clean the
internal parts and the gun body.
1. Examine openings in air cap and fluid
tip. If clogged, remove any o-rings
and soak the air cap or fluid tip in
solvent.
2. A brush or toothpick or something
similar may be used to dislodge the
dried paint from holes and passages.
NEVER USE METAL OBJECTS TO
CLEAN PRECISELY DRILLED
PASSAGES. DAMAGED PASSAGES
WILL CAUSE IMPROPER SPRAYING.
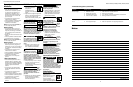
3. Remove and check the adjusting
needle for excessive wear at the tip
and straightness.
IMPORTANT: If the needle tip is worn
more on one side than the other, either
the needle is bent or the gun body has
been dropped or knocked out-of-line.
There are no adjustments that can be
made to a bent gun body. Test the
needle by rolling on a flat surface.
Replace if necessary.
4. Check and replace any damaged
o-rings and seals. O-rings and seals
can be wiped clean but not soaked in
solvent.
5. Unscrew packing nuts and replace
the packing ONLY if a leak will not
stop when the nut is tightened. Do
not over-tighten a packing nut
because this will restrict movement
of the needle.
6. Reassemble in reverse order of these
steps and use a non-silicone oil on
moving parts. Apply Vaseline
®
or
light grease on threaded joints and
hose connections.
STORING
1. When not using spray gun, turn the
fluid control knob counterclockwise
to open reducing spring tension on
needle fluid tip.
2. Spray gun
MUST BE well cleaned
and lightly lubricated.
Troubleshooting Chart
Symptom Possible Cause(s) Corrective Action
Spray pattern too small
Unsatisfactory spray
pattern
Too much spray mist
Leakage around fluid
packing nut
Leakage around
canister and canister
cover
Orange Peel
(Rough rolling
appearance similar to
an actual orange
peeling)
1. Dried material lodged in
openings of air cap
2. Lumpy material
3. Not enough material
4. Insufficient fluid pressure
1. Material too heavy
2. Dirty air cap
3. Too much material being
applied
4. Spray pattern too wide
1. Too much air pressure for
material being sprayed
2. Material too thin
1. Packing too loose
2. Worn or dry packing
1. Canister gasket not seating
properly
2. Canister not tightened
securely
1. Material drying too fast
2. Gun too far from surface
3. Material too thick
1. Clean air cap
2. Thin and strain material
3. Open fluid control knob further
4. Increase air pressure. Do not exceed 50 psi
1. Thin material
2. Clean
3. Close fluid control knob to reduce material flow
4. Close fluid control knob further or move closer to the work
1. Reduce air pressure
2. Mix with thicker material. Reduce air pressure. Open fluid
control knob gradually
1. Tighten packing nut. Replace packing if tightening does
not stop leakage
2. Replace or lubricate with non-silicone oil
1. Clean gasket. Replace if necessary
2. Tighten securely. Apply a small amount of Vaseline
®
or
mineral type grease on the threads when assembling the
canister to the canister cover
1. Use a slower solvent or add a retarding agent
2. Move gun closer to surface
3. Thin material per thinning instructions
www.chpower.com


Find Your Products By Category
Please Login
