
0
Owner's of the Makita Cordless Saw Slide Compound Miter Saw gave it a score of 0 out of 5. Here's how the scores stacked up:
[3] DISASSEMBLY/ASSEMBLY
[3]-1. Blade case, Motor section (cont.)
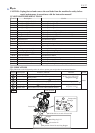
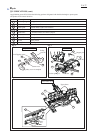
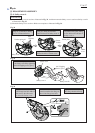
DISASSEMBLING
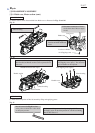
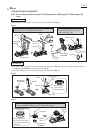
Fig. 10
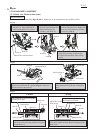
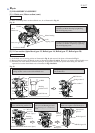
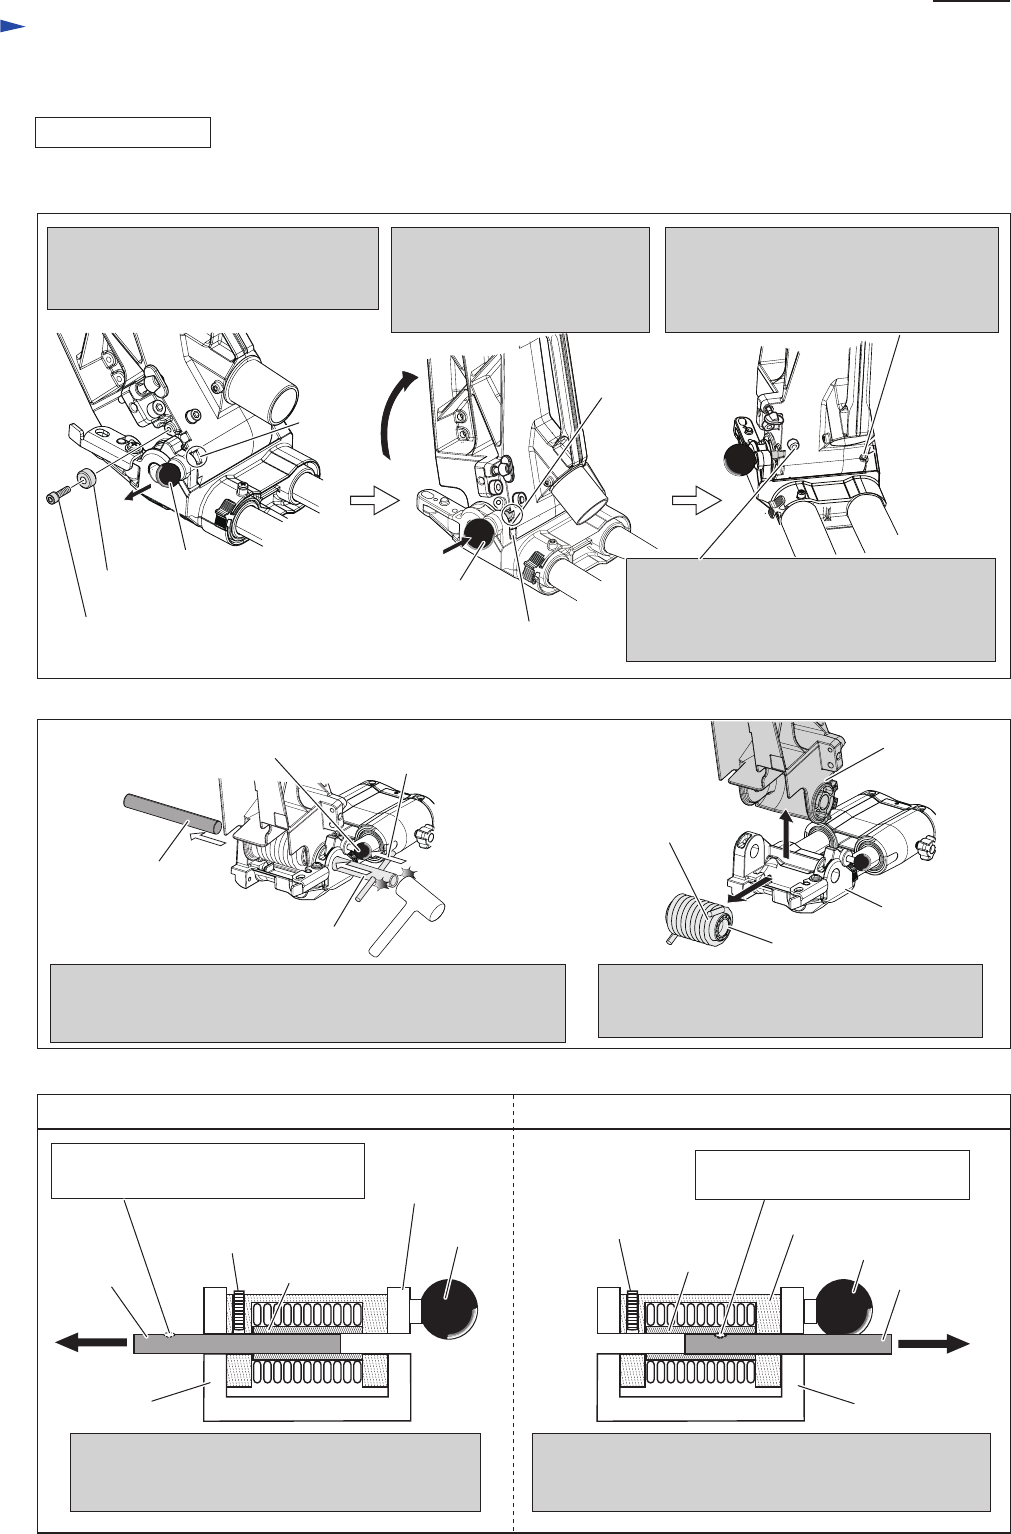
Correct Wrong
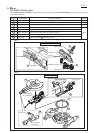
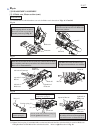
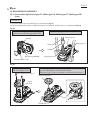
Fig. 11
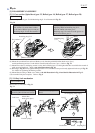
Fig. 12
Sleeve 6
2. Holding Blade case by hand,
lift up it slowly until notch A
aligns with Stopper pin.
And then, push Knob 20.
1. Remove M5x18 Hex socket head bolt
and Sleeve 6. Then pull Knob 20
while holding Blade case by hand.
M5x18 Hex socket head bolt
3. Loosen M6x16 Hex socket head set
bolt for fixing Rod 16 so slightly that
Rod 16 can be pushed out smoothly
in the step of Fig. 9.
4. Loosen M6x20 Hex socket head bolt for
fixing Torsion spring 35 until the bolt
becomes free from force of the torsion
spring.
Knob 20
notch A
notch B
notch B
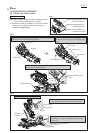
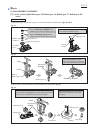
Socket wrench 10
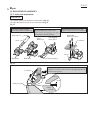
Blade case
Blade case, Torsion spring 35 and Sleeve 17
can be removed from Front arm as illustrated
above.
Sleeve 17
Torsion spring 35
Remove Rod 16 by striking the Socket wrench 10 in the same
direction in which Knob 20 is pushed. Fig. 12 is the reason
why Rod 16 has to be removed.
Knob 20
Direction for
pushing Knob 20
Rod 16
Blade case
The inside of Sleeve 17 is scraped by burr on Rod 16,
if the Rod is pulled off in the direction designated with
black arrow.
burr produced by pressure of the Hex
socket head set bolt
burr produced by pressure of the
Hex socket head set bolt
M6x16 Hex socket
head set bolt
M6x16 Hex socket
head set bolt
Front arm
Sleeve 17
Sleeve 17
Blade case
Rod 16
Rod 16
Front arm
Front arm
Knob 20
Knob 20
Knob 20
The inside of Sleeve 17 is not scraped by burr
on Rod 16, because the burr portion is not passed
through Sleeve 17.
(2) Remove Rod 16 as illustrated in Figs. 10 and 11. Blade case can be separated from Arm and Base section.
P 7/ 37
Repair


Find Your Products By Category
Please Login
